- Features by Edition
- Latest Features
- Licensing/Activation
- Installation
- Getting Started
- Data Sources
- Deployment/Publishing
- Server Topics
- Integration Topics
- Scaling/Performance
- Reference
- Guide to Views
- Keyboard Shortcuts
- Dates & Times
- Manage Fields
- Tokenised Data
- Using Formulae
- Scripting
- Mapping & GIS
- Advertising Options
- Legacy User Guide
- Translation Guide
- Specifications
- Video Tutorials and Reference
- Featured Videos
- Demos and screenshots
- Online Error Report
- Support
- Legal-Small Print
- Why Omniscope?
|
|
|
|||||
Adding ImagesAdding ImagesThousands of pictures are worth millions of words...{update to 2.5 in progress} Omniscope can be used to align a set of images in a folder with records (rows) relating to each image, such that the images associated with each record (row) can be displayed in various views:
Before you can display images, however, you must associate one or more folders of images with the .IOK file as named image sets. Preparation for this involves saving a set of images in a single folder with a consistent naming convention that matches the text values in one of the columns of your .IOK file (it may be a column included just to hold the names of the images). To save you having to find a lot of pictures in order to try this, the example below will use an Omniscope embedded demo file 'Works of Van Gogh', and its associated high-resolution image set. To take this tutorial, first click on the link below to download a zipped folder containing the images for the "Works of Van Gogh" demo. Van Gogh Demo Image Set 105.3 MB (about 4-5 minutes on broadband) Note: this folder contains many high-resolution images, making the download quite large. In order to bundle the entire folder of images together, this is a .ZIP file; do not click 'Open', click 'Save'. Download and unzip the folder, and save the unzipped folder on your desktop. Once you have saved the unzipped folder of images, open Omniscope and click Files > Demo files and select 'Works of Van Gogh'. Using the Add Images WizardThe embedded version of the demo file does not have the associated image embedded in it. Go to Settings > Images and you will see there are two options for retrieving the images, an automated, online service, and the manual approach. For this tutorial, to gain experience using the Add Images wizard we will try adding the downloaded image set manually. Select Add more images. The Add Images Wizard will launch:
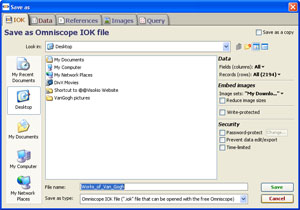
Viewing ImagesTo see your image set displayed, go to Saving reduced-size image sets reduce file sizeIf you have an activated Edition of Omniscope (Professional or Enterprise) you can experiment with saving the file with your downloaded images embedded. At the same time, you can see the trade-offs between file size and image clarity/resolution that results when you reduce the image size to reduce the size of the .IOK file. To save a version of your file click File > Save as. The Export File dialog will appear:
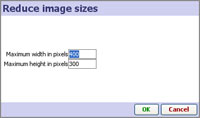
Tick the box 'Reduce Image size' . Give the new version of the file you are saving with embedded images a name, such as Works of Van Gogh 200x150.iok. Click Save and you will see an image reduction dialog that enables you to reduce the size of the images to reduce file size, but at some cost in terms of image clarity.
{update for 2.5} Open the new version of file and close all the open Views except the Tile View, which should be configured to display the now embedded image set My Downloaded Images. On the Tile View Toolbar, select the movie camera Slide show icon to the left of the Add to basket icon far right. Click 'Start slide show' and choose full screen sub-option. Look at the image quality on your screen. If it is acceptable for the audience/screen resolutions you intend, consider reducing the images more to reduce the .IOK file size further. If the image quality full screen is not acceptable, you may have to reduce the maximum size of the images less (increasing the file size), or configure the views such that images are never displayed so large. To do this, repeat the steps above, and set larger maximums in the 'Reduce image size' box. |