Using the Salesforce Visokio Reports TabInstall this free service in any Salesforce Edition, including Group Edition |  |
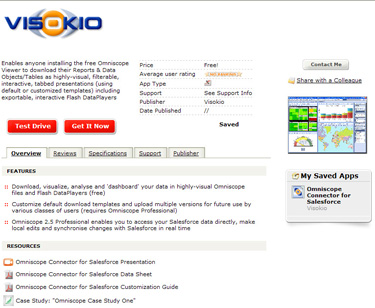
The Omniscope web connector for Salesforce is a certified, AppExchange-listed free service that can be installed by your Salesforce Administrator in any Edition of Salesforce, including Group Edition. Once installed, the new web connector tab provides your users with one-click downloads of pre-formatted, filterable, highly-visual, offline copies of Salesforce Reports and Data Objects/Tables. The downloaded files can be shared as presentations with anyone using the Omniscope free Viewer. Each file download contains all the data, configured as multi-tabbed visualisations and report.

| |  Install from the AppExchange Install from the AppExchange
If you are running the Professional, Enterprise or Unlimited Edition of Salesforce, and you are logged into an Administrator account, you can install the free web connector service just by clicking the [Get It Now]button. If you are running Group Edition of Salesforce, you can still install the web connector manually following these instructions. Once installed, the web connector tab appears at the right-most end of your opening tabs, usually with the label 'Visokio Reports'. Click on the tab At the top of the tab is a link for all users to install a free Omniscope 2.5 Viewer, with free 30-day trial of Omniscope Professional authoring capabilities anyone can use to modify the default templates. |

| | Select Report or Data Object/Table to download
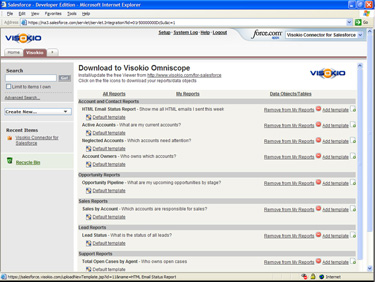
The web connector tab includes 3-4 sub-tabs:
All Reports - lists all standard and custom Reports available to the account. The one-click Omniscope icon next to each Report downloads the data using the default template. At right are options to add/remove Reports to/from the My Reports shortlist on the next tab, and to upload a new, modified template, added as a new file icon and option for future downloads.
My Reports*- a user-managed shortlist of the more important and more frequently-accessed reports. You can add or remove Reports from this page using the option on the page.
Data Objects/Tables - a listing of standard and custom (un-joined) Data Objects/Tables available to the account, which can be joined and edited and synchronised with Salesforce using Omniscope Professional.
* not available when installed in Group Edition |

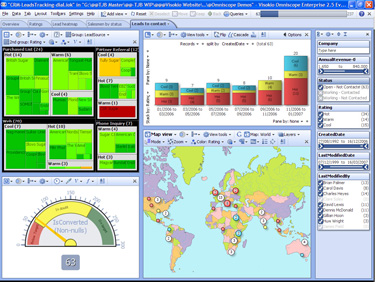
| | Your data will open in your installed Omniscope
If you clicked on a default template icon, the opening configuration of the downloaded file will be a general-purpose default provided to all users of the web connector. Default template file may not anticipate custom reports or data objects or custom fields (columns) in your data. If you send us your own versions, (scramble, disguise or delete the data in the file) we may modify and post additional templates as you suggest. |

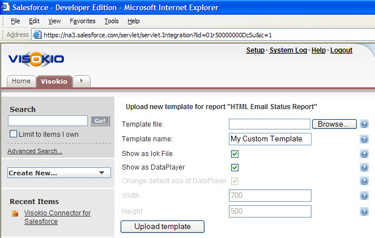
| | If you like, customise templates and upload
If you customise the default template file, you can make your customised download template available for future use with refreshed data. The Add template option enables you to upload the new file, assign a new name, and specify whether to display the additional Omniscope .IOK template as additional download/display options. Use Omniscope Professional to customise template files for different purposes or user groups. All template .IOK files can be downloaded and interacted with using the free Viewer, dramatically reducing average cost-per-seat of your Business Intelligence and reporting solution for Salesforce. |
Installing in Group Editions
WARNING: due to limitations imposed by Salesforce, when installed in Group Edition accounts, the Omniscope web connector does not support upload of customised templates, and displays All Reports, rather than the custom "My Reports" tab by default.
Group Edition installs are not done using the [Get it Now] button on the AppExchange. they must be done manually following these instructions:
To begin, go to www.salesforce.com and make sure to login to an account with a System Administrator profile
Click "Setup" at top of screen
In left side panel under "App Setup" click "Create" to expand menu
In expanded section under "Create" click "Tabs"
In the middle "Web Tabs" (not "Custom Object Tabs" above or "VisualForce Tabs" below) box, inside the Web Tabs header, click the grey "New" button centre
Step 1. Choose Tab Layout, choose "2 columns with Salesforce sidebar"
Click "Next"
Step 2. Define Content and display properties > Tab Content definition > "Tab Type" choose "URL" from drop-down list
Under Display Properties:
1. In "Tab Label" type "Visokio Reports" or whatever label you want to appear on the new tab
Leave "Tab Name" blank
2. "Tab style" click magnifier to open a list of icon/style choices
Choose any style, for example, a desk indicating desktop reports
3. Leave the Content Frame height set to '600'
leave splash page set to None
4. Fill in the Description field with something that reminds users what the application does, like:
"Delivers Omniscope files to desktop"
Click "Next"
Step 3. Enter the URL Details
In the big white box with the title "Button or Link URL" paste:
https://salesforce.visokio.com/index2.jsp?sid=={!User.Session_ID}&apiurl={!API.Partner_Server_URL_70}
(clear the space first, and make sure to delete any duplication of the initial letters 'http')
Leave the encoding setting Unicode (UTF-8)
Click "Next"
Step 4. Add to Custom Apps make sure ALL options are ticked
Click "Save"
Make sure your users have Omniscope installed. They can now click on the new Visokio Reports tab and choose a default template to download.


