- Features by Edition
- Latest Features
- Licensing/Activation
- Installation
- Getting Started
- Data Sources
- Deployment/Publishing
- Server Topics
- Integration Topics
- Scaling/Performance
- Reference
- Specifications
- Video Tutorials and Reference
- Featured Videos
- Demos and screenshots
- Online Error Report
- Support
- Legal-Small Print
- Why Omniscope?
|
|
|
|||||
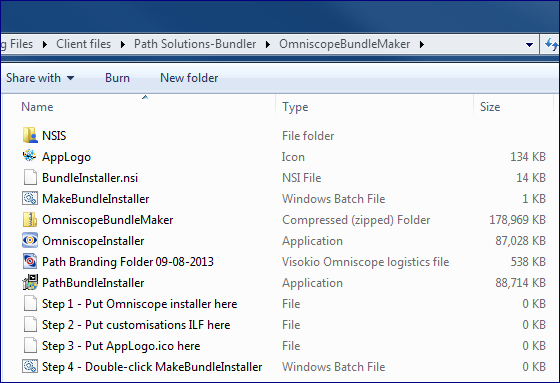
Bundled InstallersUsing the Omniscope BundleMaker Tool to Customise InstallationsRemotely installing and updating Omniscope with non-default settings and behaviorsOmniscope Partners with signed Bundling Agreements have access to the Omniscope BundleMaker tool that enables them to select an Omniscope installer build, and create a one-click executable bundled installer that also installs their own branding package (containing standard custom application styles, bookmarks, and optionally a 'welcome' IOK file), plus the Bundler's desktop icon shortcut that launches the nominated 'welcome' or 'library' IOK file contained in the 'File library' sub-folder of the bundled Branding folder whenever the bundler's desktop icon is clicked. Using the Omniscope BundleMaker toolUnzip the separately-provided BundleMaker tool (not part of Omniscope), which contains the following:
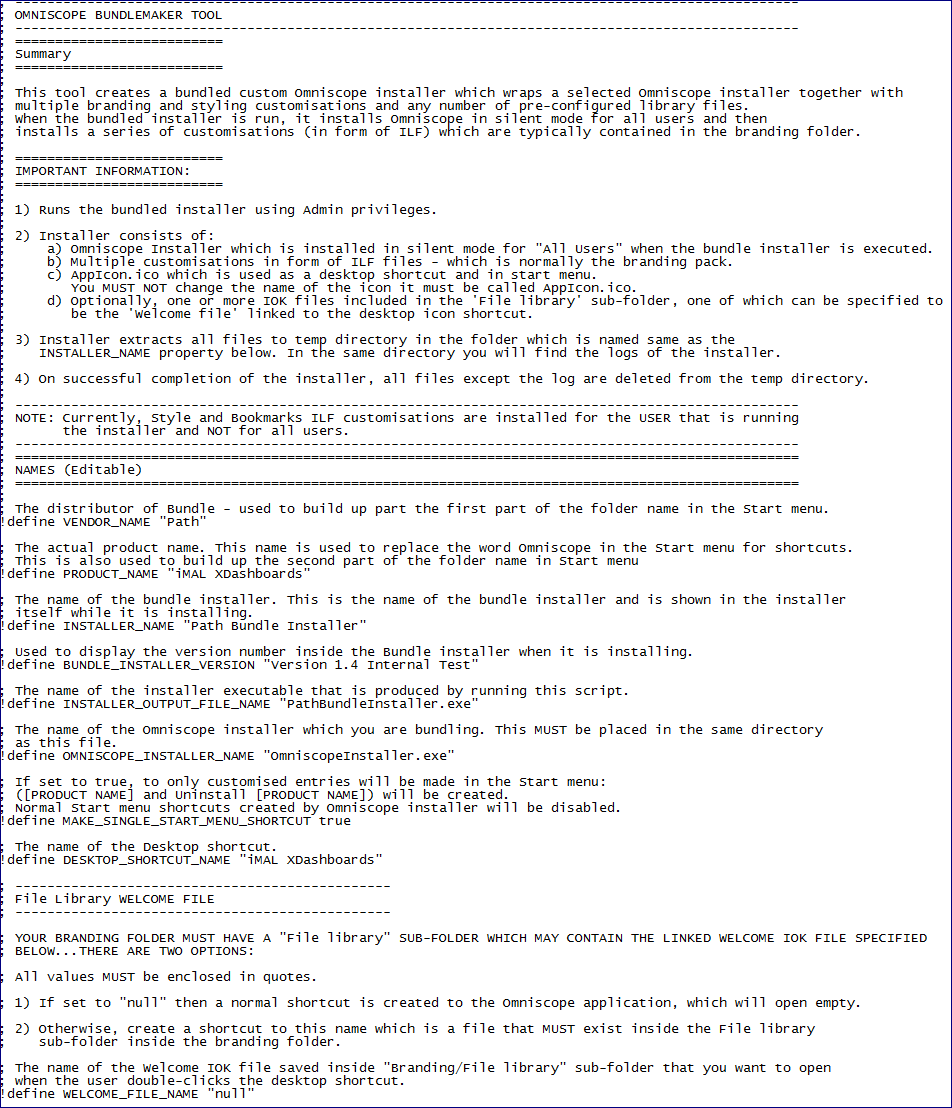
1. Select which Omniscope installer file to bundle and copy to BundleMaker folder The Visokio website provides downloadable Omniscope installers for the stable release, beta and alpha builds. Select and download the .EXE installer to be bundled and save the executable file, named OmniscopeInstaller.exe inside the BundleMaker folder. 2. Update and export the reference branding pack as .ILF and copy latest version to BundleMaker folder The bundled installer should include only one .ILF file containing the default custom branding folder to be installed to all accounts on each machine. This branding folder should be maintained and updated on a reference machine, and each new version exported as a branding .ILF file as explained here. The optional Welcome\Library.IOK file to be linked to the Bundler's custom desktop icon must be included in the Welcome file subfolder of the branding folder exported in ILF file format. The exported .ILF branding pack contains all the re-branding elements, including any Welcome\Library.IOK file to be launched whenever the Bundler's Icon desktop shortcut icon is clicked. ILF files can also be imported directly into existing Omniscope installations, with the Welcome\Library file appearing in the Omniscope File > Open menu, but the distributed .ILF method of sharing the branding folder will NOT install the Bundler's desktop icon with a link to the Welcome\Library.IOK file. 3. Copy Bundler's desktop icon used to launch Welcome IOK file to BundleMaker folder This file to be included must be called AppLogo.ico, and this is the custom icon installed as a desktop shortcut on all accounts on each machine. When the end user clicks on this desktop icon, the Welcome.IOK file included in the branding .ILF file Welcome file sub-folder will launch. 4. Make the chosen edits inside the BundleInstaller.nsi configuration file
5. Run the BundleMaker Batch file to obtain combined bundled EXE installer This will launch a process that may take some time. When finished, you will see a new, executable bundled installer .EXE file appear in the BundleMaker folder. It will be too large to e-mail. This is the installer file you can post on your web page or share via a public folder link. It will have the .EXE extension, so some firewalls may block it unless you first enclose the installer in a .ZIP folder before posting/sending it. BundleMaker folder on completion, containing larger .EXE installer: |