
Security: Single-Sign-On (SPNEGO) Configuration
-
Mobile Web Server Authentication
Single-Sign-On (SPNEGO) Mechanism
SPNEGO (Single-Sign-On) mechanism allows users to authenticate automatically with their LDAP/Active Directory (AD) account without asking them for credentials. Having a proper setup, authorized users never type their credentials in any dialog or form. Unauthorized users, however, are either prompted for credentials or are denied server access.- Users are stored and managed by an LDAP/AD server
- Omniscope Mobile server is configured to ask the LDAP/AD server to validate user tokens
Configuration
At least three machines are involved in a Single-Sign-On setup:
- LDAP/AD server (e.g. computer name ldapserver)
- A machine running Omniscope server (e.g. computer name omniscopeserver)
- A client machine having a browser installed (Chrome, Firefox, Internet Explorer, etc) (e.g. computer name browserA)
Note: Single-sign-on does not work when the client (browser) runs on the same machine as Omniscope server (or LDAP/AD)- The machines must be on the same intranet network,
- on the same domain (e.g. example.com),
- DNS properly setup such that they all can nslookup each other by name (e.g. nslookup omniscopeserver finds the machine running omniscope server)
- LDAP/AD machine - Windows Server OS (2003, 2008, 2012, etc)
- Create a dedicated LDAP user on the domain, e.g. omniscopeuser@example.com with password YourPassword (choose a stronger password), make sure the password never expires
- In command prompt execute:
setspn -A HTTP/omniscopeserver.example.com omniscopeuser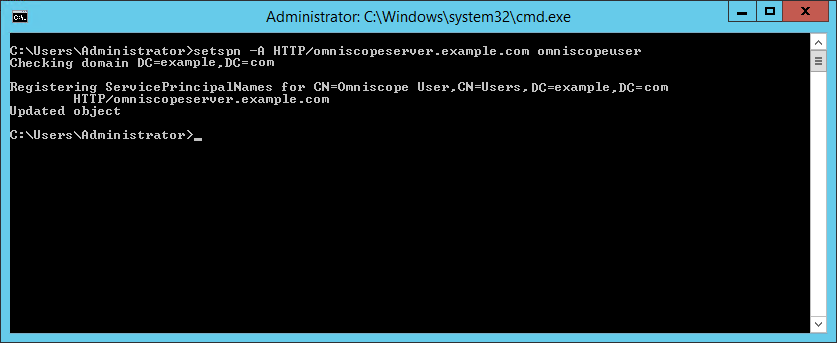
where example.com is your network domain
omniscopeserver is the name of the machine running Omniscope server
omniscopeuser is user logon name of the dedicated LDAP user
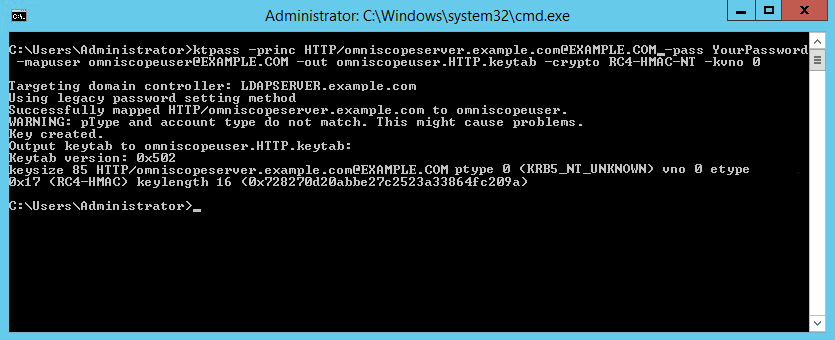
HTTP/omniscopeserver.example.com has never been mapped before with other user. If it has, you need to remove it first:setspn -D HTTP/omniscopeserver.example.com otheruser - In command prompt, execute the second command (make sure to use capital letters exactly as shown in the command):
ktpass -princ HTTP/omniscopeserver.example.com@EXAMPLE.COM -pass YourPassword -mapuser omniscopeuser@EXAMPLE.COM -out omniscopeuser.HTTP.keytab -crypto RC4-HMAC-NT -kvno 0- where example.com is your network domain
- HTTP/omniscopeserver.example.com - Kerberos service principal name for SPNEGO
- omniscopeuser - the dedicated SPNEGO user that has been created on the LDAP server
- YourPassword - password of the dedicated SPNEGO user
- RC4-HMAC-NT - cryptosystem to use when sending SPNEGO tickets
- kvno - Key version number
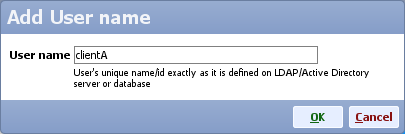
Obviously, LDAP/AD needs to have regular users defined, users that are about to use Omniscope at least. For the purpose of this tutorial we will consider that
there is a user clientA@example.com with password ClientPassword - Omniscope server machine
- Start Omniscope server

- On Mobile Web Server service section click Config, scroll down to Default folder configuration and click Edit

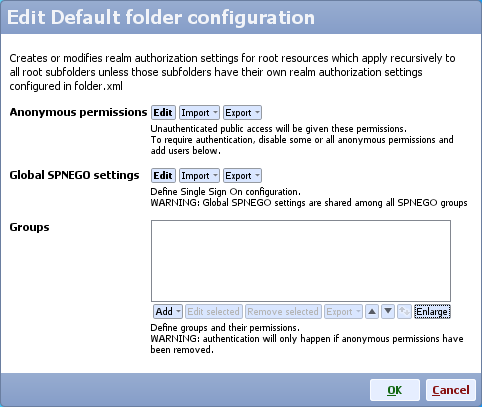
- Edit SPNEGO global settings, for principal name type:
HTTP/omniscopeserver.example.com
and edit the password for that LDAP account ('YourPassword')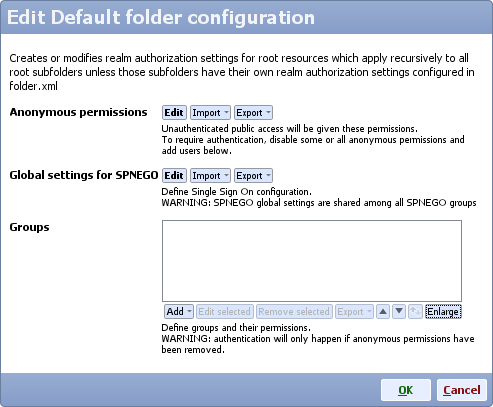
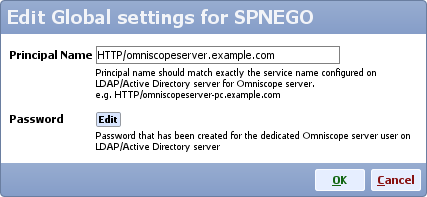
- Click OK to close editing SPNEGO global settings
- Either create a new group with new permissions, or edit an existing group
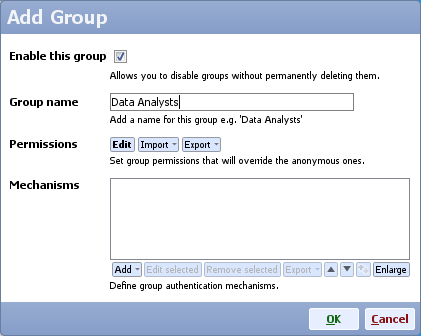
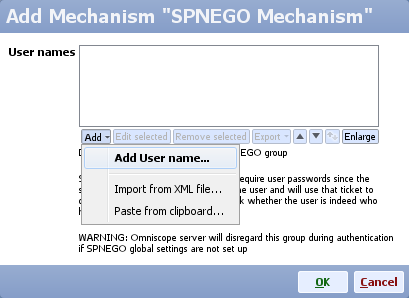
- Add a new authentication mechanism and choose SPNEGO mechanism

- Make sure you add all user names for the users that will be allowed to authenticate automatically (e.g. clientA, no domain needs to be included in the name)
- Click OK to close each dialog and click Save and apply to save the configuration
- Omniscope server does not need to be restarted manually
- Start Omniscope server
- Client Machine - The browser has to be configured to use Single-Sign-On and trust omniscopeserver machine
- For Internet Explorer
- Open Internet Options
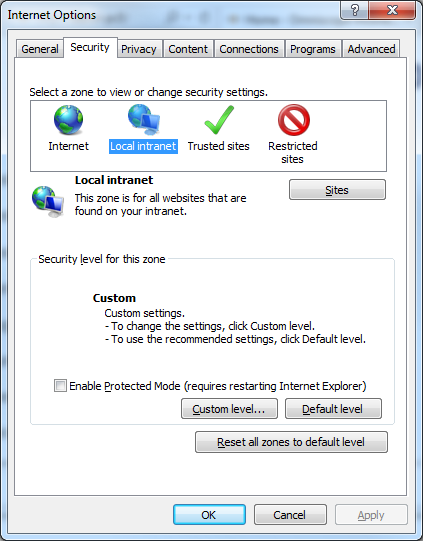
- In Security tab select Local intranet and click Sites button - make sure all check boxes are selected:
Automatically detect intranet network,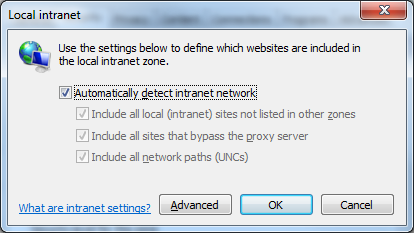
- Include all local intranet sites not listed in other zones,
- Include all sites that bypass the proxy server,
- Include all network paths
Then click Advanced button and add the name of the omniscopeserver or the full name (with domain) as it is going to be used to access the omniscope server from the browser
Note: The browser cannot use Single-Sign-On when accessing the omniscopeserver by IP instead of name, and the name has to be added to the zone
- Click Close then OK to close the Local intranet dialogs
- Click Custom Level... button, scroll down to User Authentication and select Automatic logon with current user name and password then click OK to close the dialog

- In the Advanced tab of the Internet Options dialog scroll down to Security section and make sure Enable Integrated Windows Authentication option is selected. (It should be selected by default)

- Click OK to close Internet Options dialog
- Restart Internet Explorer
- Test it: open http://omniscopeserver you should be able to use omniscope server if you have the right permissions (group permissions that you set up on Omniscope server)
- Open Internet Options
- Google Chrome
- Google’s Chrome browser shares the same configuration with Internet Explorer. Once the trusted URL is added in Internet Explorer, Chrome works with SPNEGO. Chrome does not have a configuration mechanism.
- Google’s Chrome browser shares the same configuration with Internet Explorer. Once the trusted URL is added in Internet Explorer, Chrome works with SPNEGO. Chrome does not have a configuration mechanism.
- Mozilla Firefox
- In the address bar type:
about:config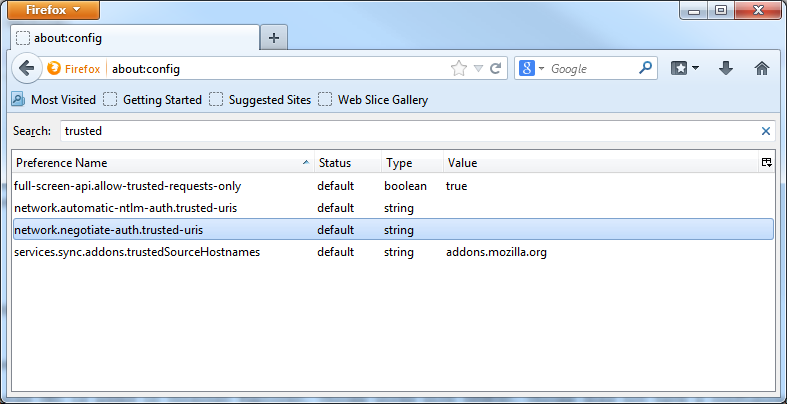
and search for trusted. The required key is a comma separated parameter named network.negotiate-auth.trusted-uris - edit it to include 'omniscopeserver' as well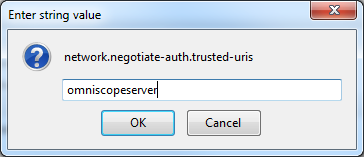
- In the address bar type:
- For Internet Explorer
Attachments
first_command.png 11K 
second_command.png 15K 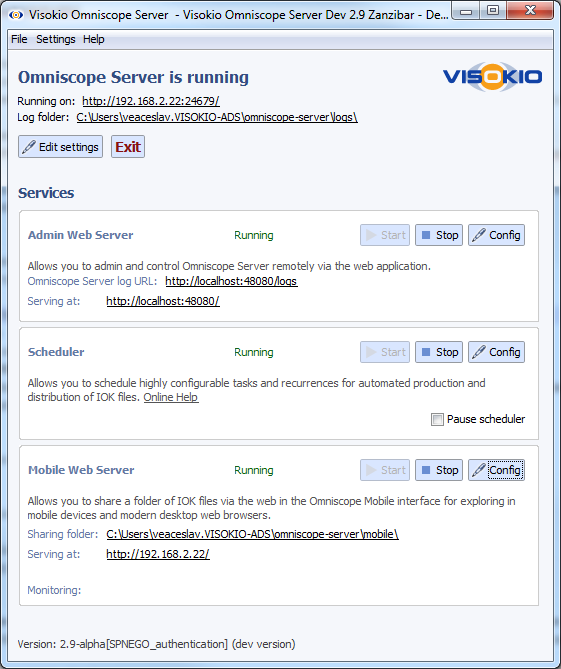
omni_1.png 67K 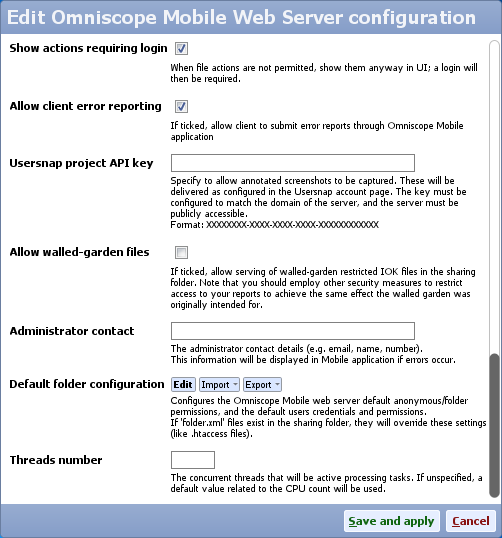
omni_2.png 39K 
omni_3.png 24K 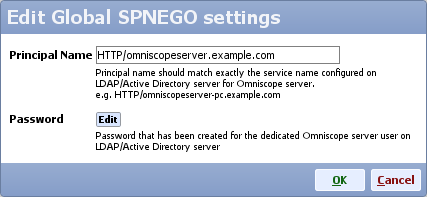
omni_4.png 14K 
omni_5.png 17K 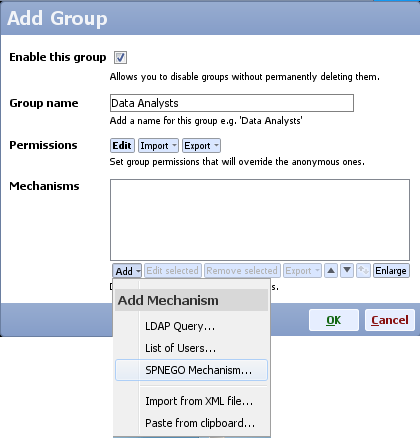
omni_6.png 39K 
omni_7.png 18K 
omni_8.png 7K 
browser_1.png 52K 
browser_2.png 31K 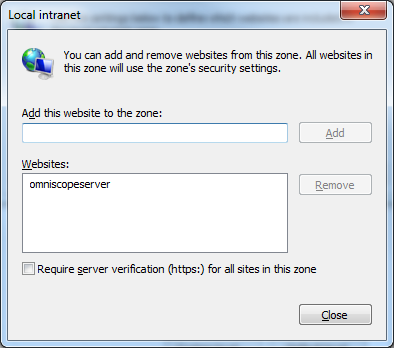
browser_3.png 29K 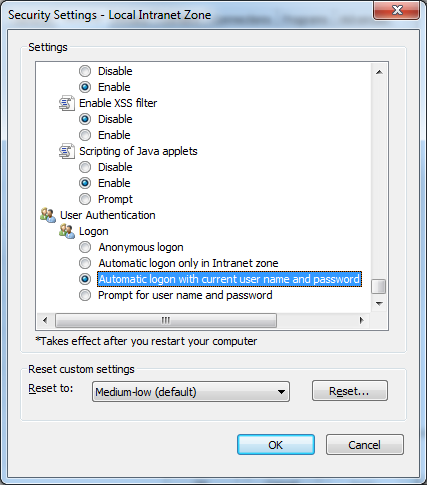
browser_4.png 44K 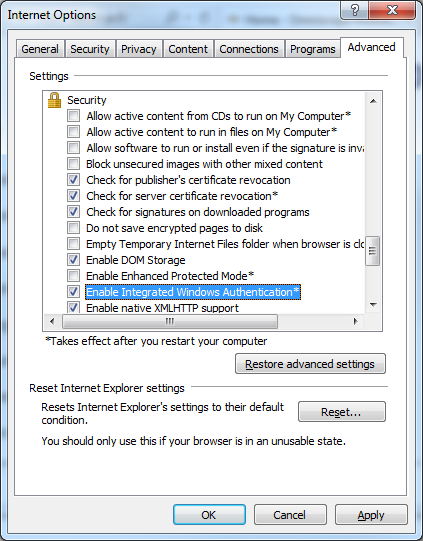
browser_5.png 50K 
browser_6.png 44K 
browser_7.png 16K 
omni_3.png 24K 
omni_4.png 14K 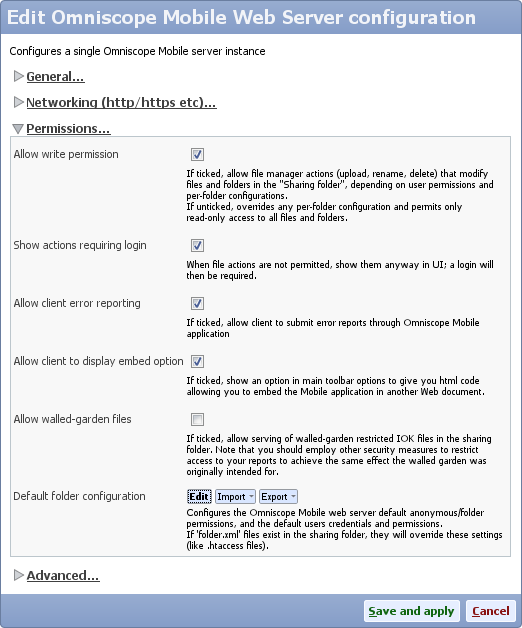
omni_2.png 46K 
omni_4.png 14K

This discussion has been closed.
← All Discussions Welcome!
It looks like you're new here. If you want to get involved, click one of these buttons!
Categories
- All Discussions2,595
- General680
- Blog126
- Support1,177
- Ideas527
- Demos11
- Power tips72
- 3.0 preview2
Tagged
To send files privately to Visokio email support@visokio.com the files together with a brief description of the problem.