From the Visokio.com homepage, click the Get Omniscope button to go to the download page. The correct installer version will be detected automatically, so all you have to do is click the 'Free Download' button and follow the installation instructions that will appear for your operating system. Everything needed will be included and you can launch Omniscope from the Desktop just like any other application.
If Omniscope free Viewers cannot be installed by your file recipients, a Java Web Start alternative is provided on the download page right at the bottom of the page. Clicking the 'Launch' button will download a Web Start version of the free Omniscope Viewer that will launch without installation and will allow the opening of IOK files on the users' PC. The Web Start version does not have a free trial and cannot be upgraded to the Desktop edition. More information on this deployment option is here [1].
This section documents the typical Windows installation process for Omniscope, and discusses options for rolling-out and upgrading Omniscope in various organisational and network/desktop administration contexts.
Note: Omniscope is a Java application that runs on any operating system that supports a Java virtual machine, including full Windows 8 Tablets, Mac OS and Linux. There is a single Omniscope installer that is both 32 and 64-bit, and includes a bundled private version of 32/64-bit Java. The bundled Java is not accessible to any other application, and is independent of any other Java installations which may be on the machine. This minimises any security issues with Java, while maintaining wide platform deployment options. The activation process to upgrade Omniscope free Viewers to authoring Desktop and Server Editions is also supported on Mac OX and on other operating systems like Linux/Unix.
The minimum system specifications and requirements for running Omniscope are outlined here [2]. Omniscope has no dependency on any other software or program, other than the private Java Virtual Machine (PVM) which is bundled with full offline installers.
Single user typical Windows install sequences (32 & 64 bit). All free Viewer downloads come with a free 30-day trial of a full Desktop Edition. From version 2.5, the free trial offer/count-down screen is not displayed to users clicking on IOK files attached to e-mails and download links, only to users trying to open files which cannot be opened by the free Viewer. Free Viewer keys that suppress all trial offers can be used in corporate deployments
Omniscope is compatible with both 32 and 64 bit versions XP. Activation is on per account basis, please do not activate from admin install account.
Omniscope is compatible with both 32 bit and 64 bit version of Vista. Activation is on per account basis, please do not activate from admin install account.
Omniscope is compatible with both 32 bit and 64 bit versions of Windows 7. However, XP Mode of Windows 7 is not supported. Activation is on per account basis, please do not activate from the admin install account.
Omniscpe is compatible with Windows 8, including full Windows 8 tablets. Windows 8 RC does not support Java, and therefore is not supported. Activation is on per account basis, please do not activate from the admin install account.
Omniscpe is compatible with Windows 10, including full Windows 10 tablets. Activation is on per account basis, please do not activate from the admin install account.
Many clients run Ominscope in virtual desktops, usually carved out of 64-bit servers with abundant RAM. Omniscope has not been tested with all types of virtualisation software such as Microsoft AppV, or any other similar programs.
The sub-sections at left cover various options for network roll-out installs and centralised deployment and corporate customisation, including any known issues and workarounds.
New documentation: This page relates specifically to Omniscope version 2.8 b313 (end Sept 2012) and later. If using Omniscope 2.6 or 2.7, or any build of 2.8 up to 312, see the older instructions [3].
If installed as a Windows Service, Omniscope Server/Publisher will start when your system starts, without a user account login required. This enables 'always-on' 24/7 services to remain running regardless of user account logins or logout.
On typical systems, this is the default option when installing Omniscope. Omniscope will be installed to the user profile under "C:\Users\[username]\AppData\Local\Visokio Omniscope app", and will not be available to other accounts. The same user account will be activated, and will also be used to run the service under.
Follow the steps above. But in this case, Omniscope is installed to "C:\Program Files (x86)\Visokio Omniscope" or "C:\Program Files\Visokio Omniscope".
Regardless of installation location, activation is typically per-user. You must ensure that the service is configured to run as a specific user account, and that same user account must be activated by logging in and entering the key into Omniscope Desktop.
Follow the same instructions as above, but if you are a user with administrative privileges, you won't need to "run as adminstrator" when you launch the command prompt. You may find that Omniscope installs system-wide rather than per-user. See the relevant installation section above.
Log files can be found in "C:\Documents and Settings\[username]\scheduler".
By default the service uses the same memory limit as the desktop app, which is 1100mb on a 32-bit system or approx. 75% installed memory on a 64-bit PC.
Advanced users can customise this to free up memory for multiple schedulers or to squeeze more RAM out of a server.
To edit the service memory configuration, open wrapper.conf in your Omniscope installation folder typically in "C:\Users\[username]\AppData\Local\Visokio Omniscope app\service" or "c:\ProgramFiles\Visokio Omnisope\service" and edit the line "wrapper.java.maxmemory", specifying a number in MB. For example:
wrapper.java.maxmemory=1100 (32-bit limit)
or
wrapper.java.maxmemory=6000 (as recommended on an 8gb server running 64-bit)
The Visokio service will by default run in the 32/64-bit mode as chosen when first installed. By default this is 64-bit on a 64-bit PC and 32-bit on a 32-bit PC. If you are upgrading an older version of Omniscope you will need to replace "wrapper.conf" as detailed above in the installation section, otherwise an old configuration will be used.
To switch between 32-bit and 64-bit, reinstall following the steps above and choosing the right option in the installer, being sure to replace "wrapper.conf" as detailed.
Make sure you're using 2.8 b313 or later and have followed the instructions above carefully. See also Scheduler troubleshooting [5] and the flowchart PDF in this forum post [6].
If you try to install Visokio as a service on Vista, you will get a"OpenSCManager Failed - Access is Denied. (0x5)" error. On Vista, you need to log on as an administrator when you install the service, as detailed in the installation instructions above.
If your service will not start after it has been installed, please check that you have a clean installation of Omniscope with an updated "wrapper.conf" file as detailed above.
Also make sure the service is configured to run under a user account which has access to the Omniscope installation folder. Make sure the same account has been activated with your license key, and not another user account.
Repeat the installation steps carefully. Get in touch on the forums [7] if you still cannot get the service to start.
If you get out of memory errors (in the scheduler or service log files, in the program folder), please check that you have a clean installation of Omniscope with an updated "wrapper.conf" file as detailed above.
See above Memory configuration [8] section on how to increase memory and switch to 64-bit Java (if you are using a 64-bit machine).
You need to restart the service for the changes to take effect.
Scheduler as a service is unable to access files on mapped network drive, because these drive mappings are only available to a desktop user session on Windows.
The way to get around this issue is by using full UNC paths (\\machine name\path) in your DataManager models and source/output paths.
See System-wide database driver location settings [9].
This usually means the "wrapper.conf" is old and applies to an older version of Omniscope. Please check that you have a clean installation of Omniscope with an updated "wrapper.conf" file as detailed above.
Old documentation: This page relates specifically to Omniscope versions prior to 2.8 b313 (end Sept 2012). This includes all builds of 2.6 and 2.7, and any build of 2.8 up to 312. You should be using a newer version, please see the latest instructions [10].
Beginning with version 2.2, it is possible to run Enterprise Edition as a Windows Service. This enables always-on services to remain running regardless of user account logins or logout.
When you have installed the application and activated it with a valid Enterprise license, browse to the applications program folder (generally c:\Program Files\Visokio Omniscope) and you will find a folder called 'Service'
Open the folder and double-click on 'Install Visokio Service.bat'. This will install the application as a service and start it. When you install the application as a service, it will run it as the "Local System" user. For security reasons the service cannot run logged on as the "Local System" user. You will need to change the service to make it log on as a user. To do this open the Services Control Manager from Control Panel, click Administrative Tools, and then click Services. Select Visokio Enterprise, right click, then go to Properties, and choose the "Log on" tab, select "This account" and enter your account name and password, then press "OK". Now start the service.
You can now manage the service as you would any other by going to "Administrative Tools" in the Control Panel and choosing 'Services'.
Configuring scheduled tasks within the Scheduler is done in the same way as before (using the 'Visokio Scheduler' item in the Start menu) the only difference being that you cannot stop the application from here and the application continues to run after the interface is closed.
If you wish to uninstall the service you can go to the same folder and double-click on 'Uninstall Visokio Service.bat'.
By default the service has a fixed limit of 1100mb. For medium and larger data files this will need to be adjusted. We recommend allowing up to 75% of installed RAM, but if running the 32-bit version of Omniscope, limiting further to 1100mb.
To edit the service memory configuration, open wrapper.conf in your Omniscope installation folder typically in "C:\Users\[username]\AppData\Local\Visokio Omniscope app\service" or "c:\ProgramFiles\Visokio Omnisope\service" and edit the line "wrapper.java.maxmemory", specifying a number in MB. For example:
wrapper.java.maxmemory=1100 (32-bit limit)
or
wrapper.java.maxmemory=6000 (as recommended on an 8gb server running 64-bit)
The Visokio service will by default run with the version that has been installed using the installer. For example, if you install Omniscope in 64-bit (default on 64-bit machines), then the service will be configured to run in 64-bit mode. You can verify this, if the wrapper.java.command in the wrapper.conf ends in ...\x64\bin\java (see below). We recommend that if you are using 64-bit machine that you always use 64-bit Java. To switch to 64-bit Java simply change the path in the wrapper.java.command to the 64-bit version (see below for full path).
Note: You will need to restart the service in order for the changes to take effect.32-bit: wrapper.java.command=C:\Program Files (x86)\Visokio Omniscope\x86\bin\java
64-bit: wrapper.java.command=C:\Program Files (x86)\Visokio Omniscope\x64\bin\java
or
32-bit: wrapper.java.command=C:\Users\[username]\AppData\Local\Visokio Omniscope app\x86\bin\java
64-bit: wrapper.java.command=C:\Users\[username]\AppData\Local\Visokio Omniscope app\x64\bin\java
Troubleshooting
If you try to install Visokio as a service on Vista, you will get a"OpenSCManager Failed - Access is Denied. (0x5)" error. On Vista, youneed to log on as an administrator. From the Start menu browse to"Command Prompt", right click and "Run as administrator". Type cd andthe location of the Visokio service folder (generally c:\ProgramFiles\Visokio Omnisope\service) and press Enter then type 'InstallVisokio Service.bat' and press Enter again. This should install your service and start it.
If your service will not start after it has been installed, please check that you have Java in your system path. This can be done by going to the Control Panel, opening "System", choosing "Advanced" ("Advanced Settings" in Vista) and clicking the "Environment Variables..." button. A new window will pop up. Under "System variables" find "Path", click edit and, if the path to the "bin" folder in your java installation is not there, type it at the end (including the "bin").
Alternatively, edit the wrapper.conf file in the service folder of Omniscope's program folder. To use a system VM:
wrapper.java.command=C:\Program Files\Java\jre1.6.0_04\bin\java
Or to configure the service to use the bundled Java VM that comes with Omniscope:
wrapper.java.command=C:\Program Files\Visokio Omniscope\pvm6u4\bin\java
If you get out of memory errors (in the scheduler or service log files, in the program folder), see above Memory configuration [8] section on how to increase memory and switch to 64-bit Java (if you are using a 64-bit machine).
You need to restart the service for the changes to take effect.
Scheduler as a service is unable to access files on mapped network drive. The way to get around this issue is by using full UNC paths (\\machine name\path).
Before installing the application you need to delete your old wrapper.conf file generally at (c:\Program Files\Visokio Omnisope\Service). As there has been configuration changes to wrapper.conf file, and a new installation does not overwrite old wrapper.conf file.
To install Omniscope in a corporate administered network environment you may either install individually, or deploy (roll out) to multiple terminals from a central location. Once installed, you will then need to activate your installation(s) to increase functionality from the read/query/print-only free Viewer to the authoring Desktop (or Server) Editions. Omniscope licensing is on a per-account, not a per-machine basis. If you install using an Administrator account, you must activate using the User, rather than Administrative account. Installing to all accounts will result in all unactivated accounts having the free Viewer installed...usually a good thing.
There is only one installer file for all Omniscope Editions. Download the full installer from here [12]
The full installers which are self-contained (include the latest Java PVM) and do not trigger further downloads.
It is advisable for the Administrator to configure the appropriate proxy settings at installation, allowing Omniscope to activate and update itself online. This can be done from Settings > {Application-wide} Advanced > HTTP Proxy Settings. Another alternative is to deploy a plain-text properties file into the Visokio Omniscope program folder in Program Files. See Proxy Settings [13]for more information.
Installations can be either unactivated Omniscope free Viewers (read/query/print-only of .IOK files), or an activated Omniscope Editions able to publish data sets as .IOM Workgroup or .IOK Professional files. If the user is intending to use only the free Viewer, then Omniscope doesn't need to be activated. However, if the user needs an authoring Edition of Omniscope, then the installation needs to be activated. Activation is by-account. Omniscope should be activated while logged in to the User account, not the Administrator account used for the installation. If another user logs in to a different account on the same machine, they will see the free Viewer only. When upgrading to a newer version, it is best to have all users refresh their activation from Omniscope:
Help > Licensing & Activation > [Refresh]
Omniscope can be deployed to multiple machines in an administered network environment using either a 3rd party application deployment management suite that will simulate the log-in of an administrator and execution of the offline installer executable, or using the silent installation option detailed below.
Using the /S (capital "S") switch, the installer will run in silent mode. You can remotely execute the following command to install Omniscope without the usual sequence of interactive wizard steps. You may need to configure the installer to run in silent mode on next login.
Z:/path/to/OmniscopeOfflineInstaller.exe /S
See Silent installation [14] for more information.
It is also possible to roll out Omniscope without the installer. Please contact [4] Visokio for further information.
There is a single-installer for all editions of Omniscope available from http://www.visokio.com/download [15]
Omniscope can be installed and uninstalled in "silent mode", useful if you are rolling Omniscope out to multiple desktops automatically.
To use silent mode, add the "/S" switch to the installer or uninstaller executable. Note: silent uninstallation is only supported by Omniscope 2.6 b553 and later.
Omniscope 2.6+ has two installation modes: per-user and system-wide.
If you run the installer in interactive mode without administrative privileges, it will prompt you whether you want to elevate and install system-wide, or install per-user (in which case the files go in the user's profile).
In silent mode, the installer and uninstaller will modify the per-user installation; to modify the system-wide installation, the installer/uninstaller must be run as administrator.
To install:
To uninstall (32-bit OS):
To uninstall (64-bit OS):
[16]http://www.visokio.com/kb/corpinst [16]
Omniscope does not fully support the use of roaming user profiles in Windows. If your network uses roaming user profiles, problems may occur, such as:
Disable roaming user profiles for the accounts in question. Alternatively, contact Visokio [4] for a list of files/folders that must be preserved on the local machine.
This page explains how to install Omniscope on a server and use it through Windows Terminal Services (WTS). This page assumes you have a basic understanding of Windows operating system and WTS.
The environment used for validation were set up in the following ways:
The WTS environment used Remote Desktop Client version 6.0.2448.0, with Windows Server 2000 Service Pack 4 and Windows Server 2003 Standard Edition.
Client operating systems tested were Windows XP Professional Service Pack 1, Windows XP Professional Service Pack 2, and Windows 2000 Professional Service Pack 4.
A user account was set up using a Microsoft Active Directory domain user group.
Note: The Anonymous User profile was not tested.
The user account was set up on the server with a restricted Common User profile, with Read, Read and Execute, and List Folder Contents permissions. These permissions enable the user to operate the computer and save documents; the user cannot install programs or make changes to the system files or settings.
The server machine was running Microsoft Office XP Professional and Standard with Service Pack 2, Internet Explorer 6.0, Visio versions 2002 and 2003, Netscape Navigator
Download and fully-install the latest version by going to www.visokio.com/download [15].
Once downloaded, double-click the installer and follow the instructions.
It is important that you choose "Install for all users" and not "Install for current user"
Follow the the rest of the installer instructions and when prompted click Finish to complete the installation.
Please note that Omniscope activation is on a per machine, per account basis. This means that each account intending to use Omniscope will need to be activated separately. If concurrent use of the same machine is aniticapted, please see the discussi9on of setting maximum RAM limits per account here [17].
Choose Start > Programs > Accessories > Communication > Remote Desktop Connection.
In the Remote Desktop Connection dialog box, type the name of the server you want to access in the Computer Name box, or select a server name from the list.
Click Connect.
Log into the server.
Open Omniscope from the Terminal Services-based server.
Please refer to test scripts [18] for further information.
Please contact us [4],or use our support forums.
[7]
Although Omniscope is not officially supported on Citrix, many clients have been deploying Omniscope via Citrix without issues. Omniscope is a standard Windows application, so it should be possible to install and use Omniscope in these environments.
Activation
Activation on Citrix environment is the same as non-Citrix environment (per account).
On Citrix Presentation Server 4.5 for Windows Server 2003 (32- and 64-bit), you may find after installing Omniscope successfully that Omniscope won't start. You may get an error message indicating "Could not create the Java virtual Machine". This message can be seen when launching using "launch_debug.exe" in the installation folder.
This is due to a problem with Citrix 4.5 for which a hotfix is available.
Please see http://support.citrix.com/article/CTX115868 [19] for the hotfix, which should resolve this issue.
If you are unable to apply the hotfix, you can try reducing the memory allocated to Omniscope [17] to below 580MB, although this will limit Omniscope's capability.
Omniscope installs an optional installconfig.properties file containing advanced settings. Normally, you do not need to make any changes to this file. It is used to customise installations in advanced ways or to add diagnostics or fault-finding settings.
Corporate administrators may wish to use this file to tailor their rollout of Omniscope, for example, to support a centralised Java VM. This file is also used to re-direct Omniscope to use 64-bit Java installs [20], and to specify customised settings [21] to be available to installed Omniscope users. This file may also be used to assist in diagnosing problems starting or using the software (see below).
The installconfig.properties file contains plain text, editable by Notepad. It is located within the installation folder, in one of the following locations, depending on your operating system and installation options:
Within the file, comments are prefixed with a space and # symbol. See the description of all available properties in the example file, below. Uncommented properties must have no leading space nor #.
# This is the installation configuration file.
# This is used to configure initial startup of the application.
#
# All properties are optional, and if defined, each line must not contain redundant whitespace
# To enable/disable a property, remove/add the # sign (# means comment)

# This is an optional manually-specified Java VM installation folder.
# It should contain bin\javaw.exe, and should be Java version 5+
# JVM_DIR=C:\Program Files (x86)\Java\jdk1.5.0_14

# This is an optional manually-specified max memory cap for the Java VM, an integer specifying the
# megabytes to allow the JVM.  Must be at least 64.
# If unspecified, 75% of physical RAM will be used as the cap.
# MAX_MEMORY_MB=300

# Optional property specifying additional space-separated JVM options.  Default is blank.
# Example which enables "heap dump on out of memory", which generates files such as
# "java_pid4972.hprof" in the program folder, for submitting to Visokio for analysis
# (requires Java 1.5.0_07+ or Java 6):
# ADDITIONAL_JVM_ARGS=-XX:+HeapDumpOnOutOfMemoryError

# Optional property which if true causes output to be redirected to
# "Visokio_output_log.txt" in My Documents
# LOG_TO_MY_DOCUMENTS=true

# Optional property which, if true, disables the default heap tuning parameters
# which at time of writing are -Xms64M -XX:MinHeapFreeRatio=20 -XX:MaxHeapFreeRatio=30
# DISABLE_DEFAULT_HEAP_OPTIONS=true
Omniscope includes its own copy of Java, which has been selected to work correctly with Omniscope, and which means your system does not have any Java-related requirements.
In rare cases when fault-finding, you may be asked to use a different version of Java. You can specify a specific version of Java to use with Omniscope by editing installconfig.properties file's JVM_DIR property. Uncomment (by removing "#" at the start, and removing any leading spaces) JVM_DIR, and then specify the location of the Java installation folder, such as "C:\Program Files (x86)\Java\jre6".
For advanced users, Java and Omniscope can be customised using JVM arguments. The installconfig.properties file's ADDITIONAL_JVM_ARGS property should be uncommented (by removing "#" at the start, and removing any leading spaces), and the arguments added after the "=" sign with spaces between them, as seen in the examples below.
For example, if you experience a "stack overflow" error, after reporting the error to Visokio, you may be able to resolve the error by increasing your Java stack size, by including the installconfig property, adjusting the 2000 value upwards if necessary:
ADDITIONAL_JVM_ARGS=-Xss2000k
If you are running on Windows go to C:\Windows\Fonts and copy all the fonts you want to make available from Omniscope to another folder such as C:\our_fonts. Now edit the installconfig.properties file as explained above. Add a command line option to specify which fonts are available by uncommenting (removing the space & hash) at the front of the #ADDITIONAL_JVM_ARGS line and provide the following: -DinstalledFontLocation=c:\our_fonts (case sensitive). Below is an example of how the modified installconfig.properties line would look:
ADDITIONAL_JVM_ARGS=-DinstalledFontLocation=c:\our_fonts
Note:it is important that to copy rather than move your fonts from the C:\Windows\Fonts location. Also note that onlyTrue Type Fonts (with .TTF extension) files can be included.
To enable this, only when advised, ensure the ADDITIONAL_JVM_ARGS line is uncommented and includes the option "-XX+:HeapDumpOnOutOfMemoryError". For example:
ADDITIONAL_JVM_ARGS=-XX:+HeapDumpOnOutOfMemoryError
This will cause a heap dump (*.hprof file) to be written to the install folder should you experience an out of memory situation. When this occurs, deliver this file to Visokio for diagnosis if you believe the error to be unwarranted. More information... [22]
You can disable free trial prompts on start-up and from the Help menu by following the steps below. If you are in a corporate environment it is recommended that you install Omniscope for all users, rather than for each individual user, otherwise you will need to carry the steps below by modifying each user account's installconfig.properties.
Find this line in installconfig.properties
#ADDITIONAL_JVM_ARGS=-XX:+HeapDumpOnOutOfMemoryError
Replace with the following line:
ADDITIONAL_JVM_ARGS=-DdisableFreeTrial=true
If you have ADDITIONAL_JVM_ARGS property already enabled, add to the end
" -DdisableFreeTrial=true"
Find this line in installconfig.properties
#ADDITIONAL_JVM_ARGS=-XX:+HeapDumpOnOutOfMemoryError
Replace with the following line:
ADDITIONAL_JVM_ARGS=-DCHECK_UPDATES_AUTOMATICALLY=false
If you have ADDITIONAL_JVM_ARGS property already enabled, add to the end
" -DCHECK_UPDATES_AUTOMATICALLY=false"
See also:
When you first use a database connection, depending on the type of database, Omniscope may prompt you to download and locate the database JDBC driver. Omniscope tracks this location, so you don't need to enter it again.
However, if there are more than one user account running Omniscope on the same machine, then when running as a different user account, these settings won't be available and you or other users on the same machine will be prompted again on first use. This may be inconvenient if configuring a system for multiple user accounts, and can prevent a 'headless' Scheduler Server running as a Windows Service from working.
Use this approach if you have multiple users launching Omniscope Desktop on the same system, and/or wish to push out a configuration centrally to many PCs.
Use this approach if you're using the Windows Service to run the Omniscope Scheduler/Mobile Web Server without a logon session.
| Database | propName | Typical propValue |
| Ingres/Vectorwise | IngresSqlDriverSearch_driverDir | C:\Program Files\Ingres JDBC Driver\iijdbc.jar |
| MySql | MySqlDriverSearch_driverDir | C:\Program Files\MySQL JDBC driver |
| Oracle | OracleThinDriverSearch_jarFile | C:\Oracle\product\11.2.0\Db_1\jdbc\lib\ojdbc5.jar |
| Postgres | PostgreSqlDriverSearch_driverDir | C:\Program Files\PostgreSQL JDBC Driver\postgresql-8.4-701.jdbc4.jar |
| MS SQL Server | SqlServer2008DriverSearch_jarFile | C:\Program Files (x86)\Microsoft JDBC Driver 4.0 for SQL Server\sqljdbc_4.0\enu\sqljdbc4.jar |
If requested by Visokio Support, a class load log can be generated as follows. This is a .TXT file containing application startup diagnosis information.
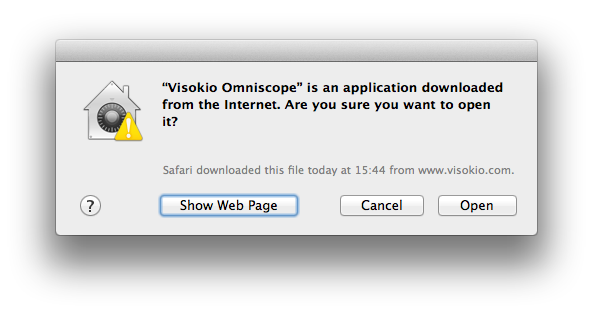
Omniscope is available for Mac OS X 10.3 or later. Requires Java 5 or later, usually already installed.
Both 32 and 64 bit operation is supported by the Mac installer, using 64-bit by default if available.
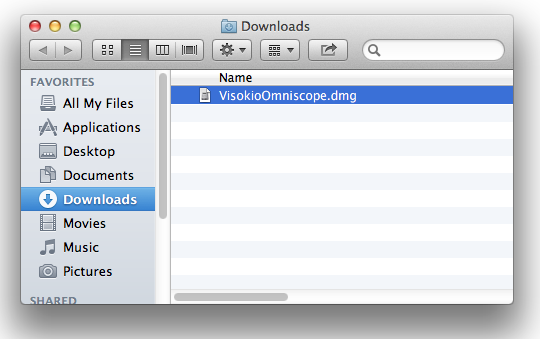
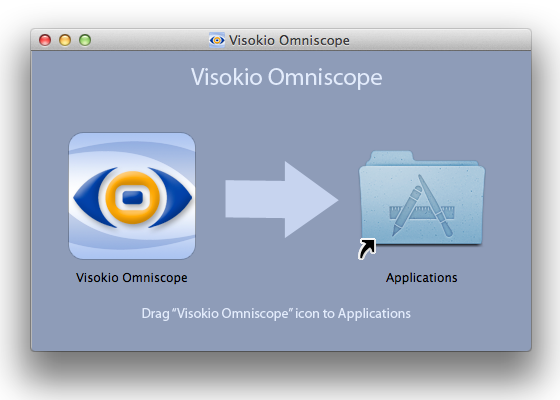
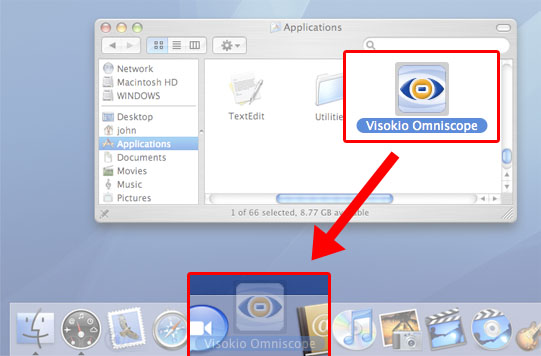
To get the Mac version of Omniscope, visit the download page [15] and be sure that "Mac OS X" is selected under "Operating System".
Primarily because the Mac has a fundamentally different operating system from Windows PCs, there are some limitations in the current Mac version of Omniscope.
From version 2.8 b365, Omniscope is available for common Linux distributions as both a desktop application and a headless server. The desktop interface will be in beta for the foreseeable future; only server installations are fully supported.
Requires a recent version of any popular Linux distributions on x64 hardware. We've tested Ubuntu Desktop & Server 12.04+, CentOS 5/6+, and the Amazon EC2 AMI. These instructions are tailored to Ubuntu.
This describes how to install Omniscope Server on a Linux server without a graphical desktop environment, such as Ubuntu Server via an SSH terminal session.
This describes how to install Omniscope on a Linux system with a graphical desktop environment, such as Ubuntu Desktop 12.10.
~/visokio-omniscope/omniscope.sh
Launches the new Omniscope application.
If launched from an interactive desktop session, the app will be running in background and available in the OS system tray.
Otherwise (if launched from a headless terminal console, such as via SSH or from Ubuntu Server), the app will run in headless mode.
~/visokio-omniscope/omniscope-classic.sh
Launches the Omniscope desktop application. If not licensed, this will be the free Viewer, allowing you to open and explore IOK files.
Activation and free trial registration are available from the application's welcome screen. Once licensed, use this to import and explore data, and create and share reports in IOK format.
Can only be used from an interactive desktop session on a desktop operating system such as Ubuntu Desktop.
The desktop interface in Linux is in beta and may suffer minor visual issues.
~/visokio-omniscope/omniscope-viewer.sh
As above, but launches the Omniscope desktop application in Viewer mode. Useful if you're currently licensed and want to preview the experience in the free Viewer.
The desktop interface in Linux is in beta and may suffer minor visual issues.
~/visokio-omniscope/omniscope-server.sh
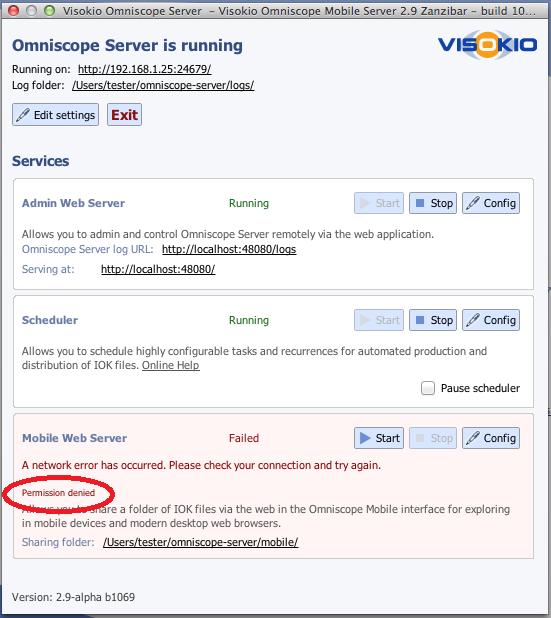
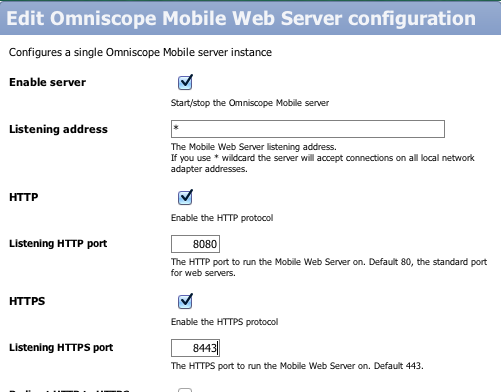
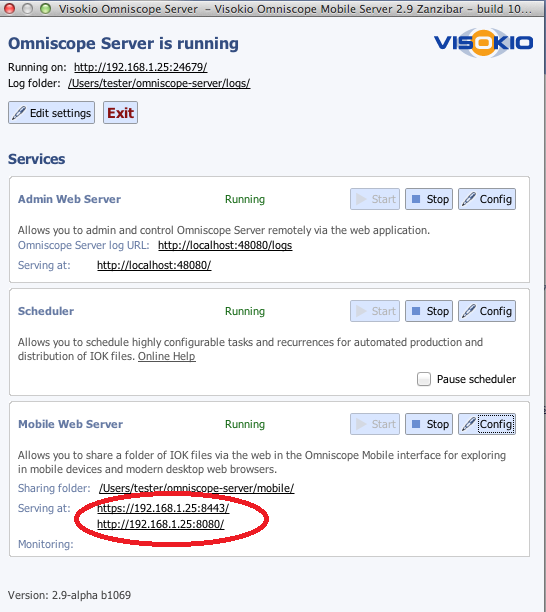
Launches the Omniscope Server application, for serving Omniscope Mobile reports, scheduling data refreshes, and executing XML actions in watch folders.
If launched from an interactive desktop session, the server dashboard window will appear, where you can start/stop and configure the Omniscope Server services.
Otherwise (if launched from a headless terminal console, such as via SSH or from Ubuntu Server), the server will run in headless mode.
Either way, status of services and scheduled tasks can be monitored in ~/scheduler/log.txt and the server configuration, containing scheduled tasks and Mobile server configuration, is located in ~/scheduler/config.xml.
Requires same the user account to be activated with a Server edition license key.
~/visokio-omniscope/omniscope-server-headless.sh
As above, but always launches in headless mode. Useful if you're in a deskop session but want to launch the server in non-interactive headless mode.
~/visokio-omniscope/omniscope-server-headless.sh -activate key
Use when unlicensed. Activates the current user account with the key specified. The key must be in the format xxxx-xxxx-xxx-xxxx
Requires an active internet connection. Non-interactive; check the terminal console for status/error messages.
~/visokio-omniscope/omniscope-server-headless.sh -reactivate
Use when activated. Renews and refreshes the license for current user account. If Visokio have extended or upgraded your license, you will need to do this.
Requires an active internet connection. Non-interactive; check the terminal console for status/error messages.
~/visokio-omniscope/omniscope-server-headless.sh -activationinfo
Displays the licensing state of the current user account.
Non-interactive; check the terminal console for status/error messages.
~/visokio-omniscope/omniscope-server-headless.sh -deactivate
Use when activated. Deactivates the current user account and makes the license key available to activate on another system (up to 3 transfers, depending on license - not available for trial keys).
Requires an active internet connection. Non-interactive; check the terminal console for status/error messages.
kill -15 PID
Where PID is the process ID of the Omniscope Java process. (You can obtain the PID by executing "ps aux | grep java" and identifying the Omniscope java process)
Use this command to gracefully stop the Omniscope app if you have started it through one of the above scripts.
sudo service omniscope-server start
Starts the Omniscope Server service. Note: the service starts automatically on system startup.
Requires the Omniscope Server service to be installed - see the Server section above. Requires Omniscope to be activated on the user account the service is configured to run as.
sudo service omniscope-server status
Displays the running/stopped status of the Omniscope Server service.
Requires the Omniscope Server service to be installed - see the Server section above.
sudo service omniscope-server stop
Stops the Omniscope Server service. Note: the service starts automatically on system startup.
Requires the Omniscope Server service to be installed - see the Server section above.
Although Omniscope is a locally-installed application, many aspects of the installation can be customised to suit specific requirements of defined groups of users. These changes affect each local installation, are persistentant across all IOK files opened in the same installation (until further changed or modified) and are easy to share accross installations by exporting and importing the resources using Omniscope ILF files.
The fonts used by Omniscope are fully configurable on an installation by installation and file-by-file basis. Organisations wishing to customised fonts availbale to meet/match corporate standards can easily do so by following instructions for customising fonts [35]. Not all fonts will support all languages. In particular, the default Omniscope Tahoma font does not support Japanese or Chinese, so the installation and/or file fonts need to be changed to fonts for non-Western data [36].
Omniscope installations include a list of editable, shareable application styles that underlie every file using that style. Each installation choices are available under:
Style > Application styles > {choose style from menu}
You can make changes to any of these pre-configured application styles by clicking on [Edit] and you can re-name and save the new style settings by clicking on [Save].
Once you have created one or more custom styles, you may wish to share these with others using the Export option:
Style > Application styles {select custom-edited application style} [Export]
The Export option will encapsulate the settings for your custom style in an Omniscope Deployable Resource file (with file extension .ILF) which you can save and share. This .ILF file can be saved in a shared location and/or attached and e-mailed to members of your workgroup with whom you wish to share/update each new custom style. All the recipients need to do is double click on the .ILF attachment and the new custom style will automatically be added to the drop-down list of available application styles in their Omniscope installation.
By default, Omniscope installations, including free Viewers, are installed without a folder in the installation directory named "branding". In the absence of such a folder with specific contents, the default Visokio screens and branding are displayed each time Omniscope install or opens.
The branding folder installed on a specific reference installation can be customised to contain various custom images, text settings and Welcome\Library.IOK files in a specified sub-folder called 'File library', as described here [37]. If the branding folder is copied to another installation, the incoming contents will take precedence over the default Omniscope settings on that installation as well.
Settings > {Application-wide} Advanced > Tools > Create distributable branding pack
Licensing permitting, for version 2.8+, the custom branding folder from the reference machine can be shared with other installations as either an .ILF file automatically installed by Omniscope, or Bundling Partners may also include the custom branding .ILF file in a bundled installer, as described here [38].
Bookmarks are used to make data sources such as specific database tables available to activated users across all their files via drag-and-drop from their DataManager Data Bars. Fully-configured (with hidden authentication) bookmarks from a reference installation can be shared and updated across multiple installations by exporting them as .ILF files which can be mailed to recipients who need new bookmarks installed or previous ones updated.
Settings > {Application-wide} Advanced > Tools > Create distributable bookmarks
Omniscope will automatically download and install any offline vector maps required for a given IOK file that are available from the Omniscope online library. You can find these maps and use them in shareable IOK files from here:
Map View Toolbar > Map: > Other vector maps
You can also download and share these maps using the Omniscope .ILF format, and may soon also be able to include them (and boundary layer files) in bundled installers (contact us).
====================================================
By default, Omniscope uses Tahoma as the application-wide font face, unless customised. It is possible to change this font face throughout the Omniscope interface - both for interface elements such as menus, dialogs and buttons, and for data elements such as bar view labels. You may wish to do this to comply with your organisation's corporate font standards, or to enable Omniscope to support a different character set for a different language, in particular, non-Western languages.
The default Tahoma does not support some non-western languages such as Chinese and Japanese. Omniscope will automatically switch to another font such as Arial Unicode MS if the Omniscope Settings > Language is set to a language requiring such characters. For more information on changing fonts to fully support certain non-Western languages, see Using Omniscope with Non-Western Languages [36].
You can use Omniscope itself to customise your own default font setting using the Settings menu. Use the Settings > Application font menu to choose the default font face for your own Omniscope installation. This application font will then be used regardless of which IOK file you have open, unless you have also further customised a file-specific font override using Settings > File font to choose a file-specific font to use in that file only.
Note that if you make the change this way, it willl only apply to your own installation, and cannot be shared with others because the changes will not be exported as part of your own shareable version of the branding folder (see below).
If your own branding folder is to be exported and shared or bundled for wider deployment, you must change your font settings by manually editing your own copies of the configuration properties files which will be exported with your own sharable branding folder.
(If you are using Vista/Windows 7 or later, you should create and edit the file in a different location such as your desktop, then move the file into the installation folder afterwards)
Once you have edited your own 'model' installation files, you can create a distributable branding folder in Omniscope .ILF format that, when clicked by users with Omniscpe already installed, will update those existing installations such that your changes to fonts are automatically installed on all recipients' machines.
Settings > {Application-wide} Advanced > Tools > Create distributable branding pack
Note that if your recipients do not already have Omniscope installed, either they must install it first before they can click on .ILF files, or you have to create a bundled installer that includes your .ILF branding pack. For more information, see Bundling Installers
This allows you to create a folder of only certain fonts which will limit the fonts available from the Omniscope font menus. You would use this to ensure all your IOK files have a standard set of fonts, preventing your users from creating IOK files departing from your corporate style guidelines.
These instructions are for a Windows PC:
The default application-wide font used by Omniscope is Tahoma, which does not have the Unicode character set necessary to support non-western language text such as for Chinese and Japanese. However, you can easily configure Omniscope to use a different font that does support non-western text. There are three ways to do this, each of which is described below. The first two options are available on an installation by instalation or file-by-file basis. The last option can be used to share the change such that they persist across any number of installations from the time they are installed or updated (2.8+).
Change the default application font that is used whenever your Omnscope installation is used to open any/all files:
Settings > {Application wide} Application font
Making the change this way cannot be shared with other installations.
Change a file specific font; changing this setting will mean only the particular file will have this font, any other files you open will use the application font setting.
Settings > {This file} File font
Making the change here will travel with the file, ensuring others open only this file with the same font). If the font is not available on a given recipient's machine, then the file will revert back to opening with their default application font.
Edit the default configuration file in the reference machine used to export shareable branding packages, as described here [35]. Then export the deployable branding pack from the reference machine and either distribute as an .ILF file to existing installations, or use the Bundled Installer [38].
The following fonts are recommended for Japanese
Windows - MSPGothic recommended (you can also try: MS Mincho, MS Gothic, MSPMincho, MSUIGothic, Meiryo)
Mac OS X - AquaKana, Hiragino Kaku Gothic Pro W3,W4,W6,W8, Hiragino Pro W3,W6, Osaka, Osaka Mon
For all other non-western languages "Arial Unicode MS" can be used. Other fonts can be used if they are available. However, "Arial Unicode MS" is known to work well and is included with Windows and Mac OS X10.5. For more information please refer to http://support.microsoft.com/kb/287247 [39]
By default, all Omniscope installations, including free Viewers, are installed without a folder in the installation directory named "branding". In the absence of such a folder with specific contents (see below), the default Visokio screens and branding are displayed each time Omniscope install or opens. The branding folder on one specific reference installation can be customised to contain various custom images and text settings that, if present, take precedence over the default Omniscope settings.
Licensing permitting, Omniscope permits power users to create/test on their own installations, then share (or remotely deploy in a Bundled Installer) copies of their own branding folders, enabling them to change appearance and features available in other installations that install or includes their branding folder.
Beginning with version 2.8, branding folders can be deployed and periodically updated as installable .ILF files either on their own (to modify existing installations), or as part of a Bundled Installer [38]that creates new, re-branded installations from a single click on the executable.
To create a custom branding folder, first choose a reference machine installation and download this sample branding folder as a starting point:
Sample default branding folder [40] (.ZIP)
Examples of all the elements that can be rebranded on full Omniscope installs are available in this download. Add your branding to the images as necessary (some images are size sensitive) then edit the config.properties file appropriately as documented in the example file itself.
If you have a bundler version of Omniscope installed on the reference machine, you can also download and click on a sample .ILF branding package to have Omniscope install it automatically:
[41]Bundler default branding package [42] (.ILF)
The location of the branding folder once installed will depend on the version of operating system on the refernce machine, and whether Omniscope has been installed on that machine for All User accounts, or only the Current User account:Windows OS: Omniscope installed for all users (default):
The branding folder contains sub-folders and files that can be used to determine the behavior of all installations having the branding folder installed in the required location. Sub-folders include:
Category & Continuous DataColourPresets: These folders contain XML files that define the coloring menu options visible in the Omniscope menu under:
Style > Data Colours > {Categories} and also {Continuous}.
Deleting one or more of these XML files will eliminate them from the Omniscope menu, and adding customised colour pallettes will add new, bundler-specific pallette options to the Omniscope menus. You can use tools available inside Omniscope to create and export customised colour pallattes in XML format ready to be copied into these sub-folders to add them to the menus available in the rebranded installations.
File library sub-folder and files: This sub-folder optionally contains at least one 'welcome' IOK file configured by the brander/bundler intended to open from the re-brander's desktop shortcut icon placed on the users' desktops by a Bundled Installer. A specified 'welcome' IOK file is usually configured to act as a starting point or 'index' with heavily styled Omniscope Opening and Closing screens, Web and Content Views (usually containing links to all the files in the File library sub-folder), Help screens and other network/web content links to provide Bundled installation users with an overview and next steps to take once they have installed Omniscope for the first time. Any number of files can be included in the File library sub-folder and can be linked to from links within the specified 'welcome' IOK file.
Images sub-folder and files: Report IOK file templates often contain many types of images which are not part of the data set, but are used throughout the file, and therefore need to be available for the creation of new files. Standard versions of company logos, background images, Blank View images, banner ad images, etc. can all be distributed (so that they are always available to report authors) by saving the latest copies in the Images sub-folder of the branding folder, such that they become part of the exportable, shareable branding .ILF, and through that, part of all the bundled installers featuring that particular verion of the branding ILF.
Themes: This sub-folder contains the custom XML files that determine which pre-defined Application Style options are visible from Omniscope under:
Style > Application Styles .
The visible style list will also include any user-specific custom application styles to be added to the Omniscpe menu, for example corporate styles to be shared with all corporate users. Additional Application Style files can also be shared on a user-by-user basis by exporting the modified styles as .ILF files and sending them to the users who need them.
Application display images: The various start-up, welcome screen and other branding image files in the top level of the branding folder are documented within the folder itself using text files with the same name as each image file. All of these image files can be replaced with custom images of the same size (in some cases), or of any size (in other cases) to create a re-branded installed version of the Omniscope.

This file should contain either the default, or the Style > Edit Style Presets custom settings. Use Tools > Export in the Edit Modes dialogue to save a copy of the customised settengs as an XML file. Share this XML file with others either by sending it to them for import, or by renaming the customised XML file to overwrite the default 'LayoutModes.xml' and saving it in the branding folder as shown above. This will ensure that all installations sharing the branding folder will dsisplay the customised presets, ensuring that chaging between Modes will not change any branding-specific styling or colour pallettes that have been established as standard.
Within the branding folder, many aspects of the installed application behavior can be customised by following the instructions inside the 'config' properties text file. Each option is documented within the 'config' properties file itself. You can comment/uncomment the changed 'config' properties text file using # characters. An example of the settings available in this file is shown here [43].
Corporate environment and bundled installers install Omniscope for all user accounts on the machine, rather than for each individual user account. If you are working on a Windows machine with a version later than Vista, you will need to work on files in the branding folder from an editable location such as My Documents, then drag the edited versions with Vista+ Windows UAC confirmation into the program branding folder when you want to see the results. This is only true if Omniscope has been installed for all users, as it will be for bundled installs by default. If you are working from a current user installation, you can edit the files in the branding folder directly. In Windows XP, you can edit the file directly in the program folder.
To preview your results, install Omniscope normally and put the work-in-progress branding folder inside your Omniscope program folder, or click on a Branding ILF exported from a reference installation, then start Omniscope. Deleting the branding folder will return an installation to the default settings.
(see full documentation of the branding folder installation config.properties file here [43])
Disable Free trial - You can disable free trial prompts on start-up and from the Omniscope Help menu for custom installs by adding the following line in the config.properties file:
DisableFreeTrial=true
Disable automatic update check - You can change the default Omniscope setting to always check for the latest updates by adding the following line:
CHECK_UPDATES_AUTOMATICALLY=false
=============================================================================
Please note that further customisations may be available other than those specified in this example of the config.properties file - contact us [4] for more information.
Within the Branding folder, a text file called config (.properties) is used to change the appearance and behaviors of the re-branded Viewer when installed with the branding folder. Below is a copy of an example and the documentation text avauilable inside the file itself:


Omniscope Partners with signed Bundling Agreements have access to the Omniscope BundleMaker tool that enables them to select an Omniscope installer build, and create a one-click executable bundled installer that also installs their own branding package (containing standard custom application styles, bookmarks, and optionally a 'welcome' IOK file), plus the Bundler's desktop icon shortcut that launches the nominated 'welcome' or 'library' IOK file contained in the 'File library' sub-folder of the bundled Branding folder whenever the bundler's desktop icon is clicked.
Unzip the separately-provided BundleMaker tool (not part of Omniscope), which contains the following:
NSIS Folder
BundleInstaller.nsi
MakeBundleInstaller.bat
and a list of text files defining Steps 1 to 5
1. Select which Omniscope installer file to bundle and copy to BundleMaker folder
The Visokio website provides downloadable Omniscope installers for the stable release, beta and alpha builds. Select and download the .EXE installer to be bundled and save the executable file, named OmniscopeInstaller.exe inside the BundleMaker folder.
2. Update and export the reference branding pack as .ILF and copy latest version to BundleMaker folder
The bundled installer should include only one .ILF file containing the default custom branding folder to be installed to all accounts on each machine. This branding folder should be maintained and updated on a reference machine, and each new version exported as a branding .ILF file as explained here [37]. The optional Welcome\Library.IOK file to be linked to the Bundler's custom desktop icon must be included in the Welcome file subfolder of the branding folder exported in ILF file format.
The exported .ILF branding pack contains all the re-branding elements, including any Welcome\Library.IOK file to be launched whenever the Bundler's Icon desktop shortcut icon is clicked. ILF files can also be imported directly into existing Omniscope installations, with the Welcome\Library file appearing in the Omniscope File > Open menu, but the distributed .ILF method of sharing the branding folder will NOT install the Bundler's desktop icon with a link to the Welcome\Library.IOK file.
3. Copy Bundler's desktop icon used to launch Welcome IOK file to BundleMaker folder
This file to be included must be called AppLogo.ico, and this is the custom icon installed as a desktop shortcut on all accounts on each machine. When the end user clicks on this desktop icon, the Welcome.IOK file included in the branding .ILF file Welcome file sub-folder will launch.
4. Make the chosen edits inside the BundleInstaller.nsi configuration file
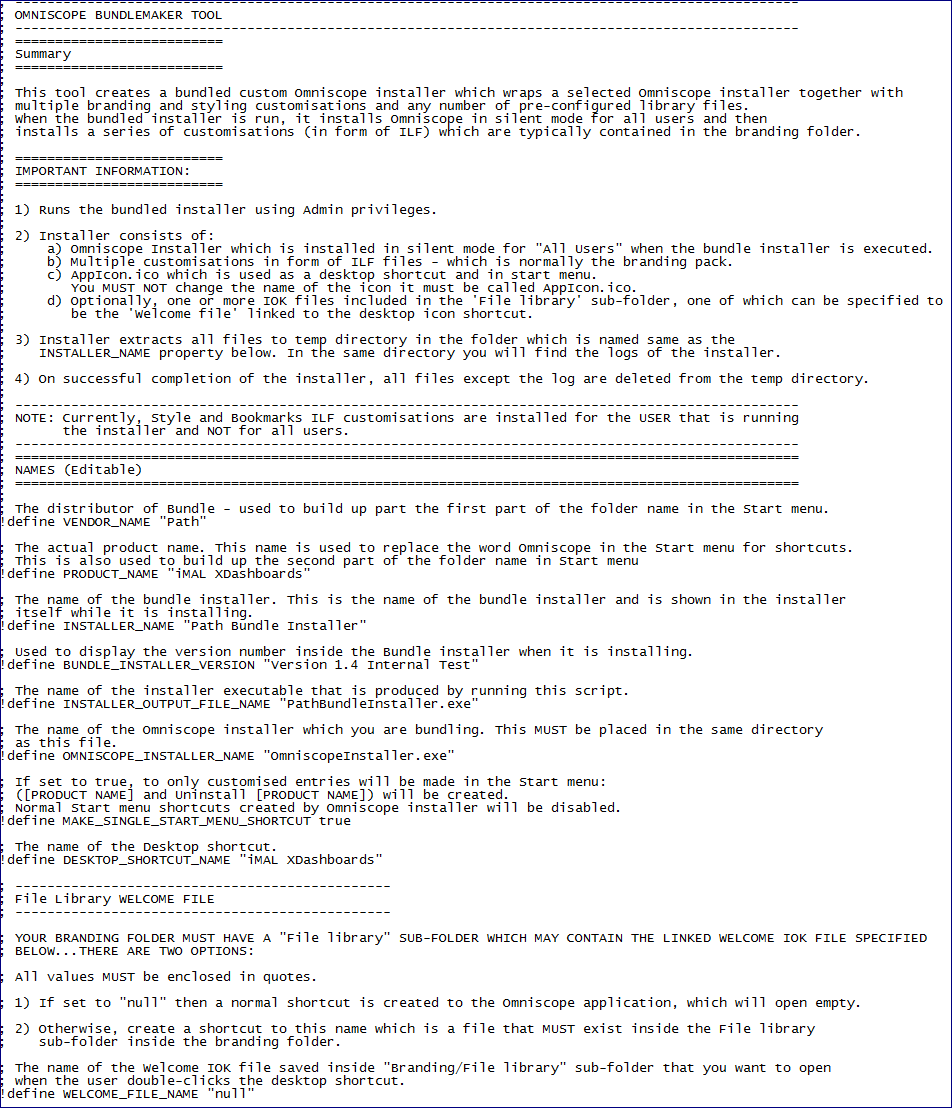
5. Run the BundleMaker Batch file to obtain combined bundled EXE installer
This will launch a process that may take some time. When finished, you will see a new, executable bundled installer .EXE file appear in the BundleMaker folder. It will be too large to e-mail. This is the installer file you can post on your web page or share via a public folder link. It will have the .EXE extension, so some firewalls may block it unless you first enclose the installer in a .ZIP folder before posting/sending it.
BundleMaker folder on completion, containing larger .EXE installer:

Please contact us [4] for futher information and extension of options to bundle additional files, such as offline maps, boundary layers etc.
Omniscope is also available as a standalone executable JAR file, suitable for operating systems without an install package. You will need Java 5 or later.
To get the JAR version, please visit the download page [12] and be sure to choose Cross-platform JAR in the Operating System section of the blue box.
Once you have downloaded it, please follow these instructions for launching from the command line [44].
The same JAR file is used via Java Web Start when launching Omniscope Online.
The JAR file is not installed and cannot be activated. It provides viewing-only capabilities for existing IOK files.
Since the JAR file is cross-platform, the following platform-specific functionality is missing:
Always check the Forums to see if your issue has been addressed; This link will access all installation tagged posts in the Forum:
http://forums.visokio.com/discussions/tagged/installation [45]
Java is a free addition for all operating systems, including Windows, Mac or Linux/Unix. Full installations of Omniscope include their own private version of Java (PVM). This means that no other applications use the version of Java bundled with Omniscope, minimising any possible security issues with Java, while maintaining the all advantages of Java portability across all types of devices, except iOS IPads and Android tablets, that do not support Java, although Windows tablets do.
The version of Java bundled with Omniscope is incremented periodically, since Java is open-source and being improved continuously. There are sometimes a few outstanding known issues in each new version of Java. We try to anticipate and help manage these rare issues when possible until fixes are included in the next release of Java. The most current version of Java is always available from the official Oracle Java site [46]. Information on known Java installation issues is here [47].
When launching Omniscope, you might encounter the following error "Unable to create Java Virtual Machine".
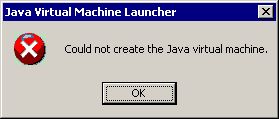
You might also see these types of error messages:
"Error occurred during initialization of VM
Could not reserve enough space for object heap
Could not create the Java virtual machine."
If you see this message, or one similar indicating the Omniscope cannot start, please read possible solutions for this issue on this link Memory fragmentation [48].
Automatic activation, updating and bug reporting functions all depend on Omniscope being able to access the Internet. Firewall settings and additional machines between your machine and the Internet called Proxy Servers can interfere with the ability of the Visokio application to access the Internet. In general, correct Proxy Server configuration will ensure that all functions are available. If not, in each case, there are work-arounds available:
Following error message may (rarely) appear on Omniscope startup:
"Your computer is not configured correctly. Omniscope is unable to determine the user profile directory correctly and is using a temporary directory as a fallback."
To solve the issue, please attempt the following:
If you experience hanging with no Omniscope error message displayed, first consult the list of known Java issues below, some of which you can resolve by updating your version of Java.
Note: Neither Windows nor Java allow file names with '?' or other special characters such as '*' in the file name. If you use a '?' or '*' or other special characters when you specify the file name, nothing will happen. Try saving the file with a different name not including unusual characters.
Java will not start - There is a known issue involving a small percentage of machines that start with very fragmented memory available to Java, which requires contiguous memory of the specified amount to start. More information [48]
If your installation opens normally, but at some point experiences hanging or freezing, and you do not see an error message, and you are not experiencing one of the known Java problems outlined above, please follow the hang diagnosis procedure [51].
If you are experiencing graphical glitches and artifacts in some of the Omniscope views (especially the web-browser-based Web View, please follow the steps below to resolve the glitch by setting the system property "sun.java2d.d3d" to "true". This property is normally set to "false" by default to fix potentially slow rendering when making selections in the Graph view.
#ADDITIONAL_JVM_ARGS=-XX:+HeapDumpOnOutOfMemoryErrorRem
ADDITIONAL_JVM_ARGS=-Dsun.java2d.d3d=true
(Note: if you are running on a 64-bit machine "installconfig.properties" is located at "C:\Program Files (x86)\Visokio Omniscope").
If the above still does not fix, you may also want to try the following property. (Please note the following will only work in on version 2.6+)
You may have reached the data capacity limit on your computer. This is more often a problem with computers running 32-bit Windows, which limit data addressing space. Please consider using the 64-bit Windows and installing the 64-bit version of Omniscope. Both are available at no extra charge. Machines with 64-bit Windows can access billions of times more data than machines running 32-bit Windows.
1) As a possible fix with existing Operating System and RAM, please push the maximum memory above the 75% default as instructed in this page [17].
It is recommended that if you are on a 32-bit PC with 2GB memory, that you push the limit up to 1750MB. In case you run multiple instances of Omniscope, they will all use the same settings, as configured in installconfig.properties, so you will have to decrease memory allocation and make sure MAX_MEMORY is adjusted so it leaves some memory for the OS (on a machine with 4GB of ram and 2 GB pagfile, with 4 Omniscope instances running - Xmx should be set to 2GB).
2) You can also try to increase the -Xms, in installconfig.properties, which is the initial memory allocated to Java. Default of 64M might be too low and you can try 256M.
For example, to set Xms to 256 use:
ADDITIONAL_JVM_ARGS=-Xms256M
Note: there is dash before capital X, followed by 'ms' followed by a number and ending in a 'M'
3) Set DISABLE_DEFAULT_HEAP_OPTIONS=true in installconfig.properties . Turning this option on will disable Omniscope's default memory options and may have an impact on memory.
4) Add "-XX:+UseParallelGC" without the quotes to "Additional_jvm_args property in installconfig.properties. This is useful diagnostic tool it helps us verify if the default Java memory management algorithm is causing the issue. Turning this option on effectively replaces the default with an another algorithm. The role of the memory mamangent algorithm is to go through and release memory so that when certain sections of memory are no longer required they are freed so that they can be used later.
If any of the above has not solved your problem, contact us for further help.
If you are in a typical medium to large organisation, your PCs may access the Internet through a proxy server. Proxy servers are separate computers that act as gateways and are used to improve security and efficiency.
Omniscope needs to be able to access the Visokio servers for various reasons including activation, automatic updates and sending bug reports. These servers are accessed via host services.visokio.com, port 80.
Also, some user-configured functionality requires Omniscope to retrieve data from user-configured sites on the internet - such as live price quotes and web services. Note: that Omniscope only retrieves text and value data from websites configured by the user, and never retrieves executable content or data that may be considered a security risk.
Omniscope detects proxy settings automatically, out-of-the-box. You should not need to make any configuration changes to your Omniscope installation.
In rare cases this does not work with a particular organisation's proxy settings policy. You can tell when proxy settings are not working when Omniscope is unable to check for updates but your web browser is able to access the internet successfully.
If auto-detected proxy settings do not work, you can manually configure your proxy settings (below). Alternatively, if you only wish to permit access specifically to the Visokio servers to support license activation, you may be able to reconfigure your proxy server and firewall to allow direct access specifically to services.visokio.com, port 80.
When activating Omniscope, if the proxy settings detected are not correct, Omniscope may ask you to enter these as part of the product activation dialog steps. If the Online activation failed dialog appears, click the Proxy settings button and enter the details, as described below.
Remove any manually specified proxy settings you may have made and verify that the Internet is accessible, but that Omniscope does not work. Install Omniscope from the full installer (which includes Java) on a clean PC and test. This will rule out a different Java VM and the possibility of any manual settings still taking effect.
Leave any manually specified proxy settings removed for the following tests.
Try passing the startup property "visokio.disableSystemProxies", by adding the line below to the installconfig.properties file in the installation folder, making sure this line does not already exist without a preceding "#":
ADDITIONAL_JVM_ARGS=-Dvisokio.disableSystemProxies=true
If this has no effect when you restart Omniscope, revert this change.
Also try the following:
ADDITIONAL_JVM_ARGS=-Dvisokio.disableCustomProxySelector=true
If this has no effect when you restart Omniscope, revert this change.
Finally, try enabling the startup property "enableProxyDebug", by adding the line below (again, making sure this line does not already exist without a preceding "#":
ADDITIONAL_JVM_ARGS=-DenableProxyDebug=true
Restart Omniscope, verify the Internet is not available, and submit an error report from within Omniscope, which should be clearly labelled. You will need to email the saved report to us. We may be able to determine from this whether there is a problem with Omniscope, or whether it is a fault with Java's detection of proxy settings.
Also use the debug launcher (Omniscope_debug.exe or launch_debug.exe in the installation folder) and send us screenshots of the dialogs that appear.
If you are a system administrator and are deploying (rolling out) Omniscope to multiple PCs, you can simultaneously roll out proxy settings. This permits your deployed installations to be activated by your users based on your exact proxy configuration settings if they are unusual..
for HTTP proxy to:
                   #Resource properties file
                   #Wed Feb 15 13:37:09 GMT 2006
                   http.proxyPort=80
                   http.proxyHost=proxy.visokio.com
for HTTPS proxy to: #Resource properties file
#Wed Feb 15 13:37:09 GMT 2006
https.proxyPort=80
https.proxyHost=proxy.visokio.com
There is a known, machine-specific Java issue that affects less than 1% of PCs, which start with Java memory so fragmented that the contiguous block required for the Omniscope bundled Java PVM to start is not available. In other words, the 1100 MB default Java memory cap set in Java for Omniscope is too high relative to available contiguous memory on a few (mostly older) PCs, despite the PCs in question having 2 or even 4 GB of RAM memory. This condition is more common under XP but can affect Vista PCs as well. When Java fails to start because of memory fragmentation, the user will typically see messages like:
Error occurred during initialisation of VM
Could not reserve enough space for object heap
Could not create the Java virtual machine.
A major reason why this problem occurs is because Windows loads DLLs into the same memory space as the one Java uses which causes memory to become fragmented. Unfortunately optimizations in Windows that minimize the relocation of DLLs during linking make it more likely you'll have a fragmented address space. Other files that are likely to take space include security software, CBT software, spyware and other forms of malware. Likely causes of the variances are different security patches, C runtime versions, etc.
More information discussing the this problem can be found on the links below:
There are several possible solutions to resolve this problem:
Try reducing the default memory allocation till Java starts. If we were to reduce the default 1100 MB cap further to allow for such machine-specific conditions, we would be reducing the great majority of Omniscope users' data management capacity for the needs of the very few. If you have a machine with this problem, the current work-around is to manually reduce the specified Omniscope memory cap in stages (reduce to 1000 MB, then reduce to 900 MB, etc.) until Omniscope will starts on the affected PC. In some cases, the memory cap has to be reduced to around 650 MB. The process for changing memory allocation of Omniscope can be found here [17].
Change to a 64-bit operating system, which will generally resolve not only this issue, but will also provide lots other performance and data set capacity benefits as well, as explained here [20]
In the event of the application hanging (freezing, so no user interaction is possible), please use the following procedure to send a hang diagnosis to Visokio (Windows PCs only). Although these steps may seem complex, this will help us greatly with what can be a difficult problem to diagnose. For assistance please contact us.
Java is freely downloadable, open-source software that provides a 'virtual machine' or VM that permits software like Omniscope to run on many different machines and operating systems. For more information on Java, see Wikipedia [58]. Visokio applications are pure Java applications that run 'on top' of a 'bundled' Java virtual machine which runs 'on top' of your machine's operating system. The Omniscope installer includes its own 'private' version of Java, not accessible to any other application for maximum security. Java is open-source software that is being continuously improved. Periodically, there is a new release of Java, and known issues in Java emerge which are relevant to installation and performance of Visokio applications.
You only need to worry about the shared, general-purpose version of Java installed on your or recipients' machines when you use the Web Start deployment option for your IOK files. But if you choose to deploy files using Omniscope Online (Web Start) instead of the fully-installed free Viewer, all the machine you plan to distribute to will need to have Java 5 or later.
In this section, we summarise known Java installation issues and implications of up-grading to the latest versions of Java. Other known issues with Java that do not affect installation, but can cause a hang with no Omniscope error messages are listed here. [59]
Java has security settings which may affect the treatment of images. If user settings restrict access to certain packages in particular the sun.awt.image package within Java then certain views can be affected. The following issue has been seen before:
java.security.AccessControlException {class java.security.AccessControlException "access denied (java.lang.RuntimePermission accessClassInPackage.sun.awt.image)"
at java.security.AccessControlContext.checkPermission(Unknown Source)
at java.security.AccessController.checkPermission(Unknown Source)
at java.lang.SecurityManager.checkPermission(Unknown Source)
at java.lang.SecurityManager.checkPackageAccess(Unknown Source)
at sun.misc.Launcher$AppClassLoader.loadClass(Unknown Source)
at java.lang.ClassLoader.loadClass(Unknown Source)
at java.lang.ClassLoader.loadClass(Unknown Source)
at java.lang.ClassLoader.loadClassInternal(Unknown Source)
It is likely that your security policy is not letting you access to classes in java.awt.image packages.
Access to classes in AWT package, viz., and the java.awt.image packages are required.
In order to fix this problem you need to grant Omniscope users permission by adding the following statement
grant {
permission java.lang.RuntimePermission
"accessClassInPackage.sun.awt.image";
}
to any of the security policy files referred to by statements such as
policy.url.1=file:${java.home}/lib/security/java.policy
policy.url.2=file:${user.home}/.java.policy
in the Java security configuration file for your installation. This file should
be located at ${java.home}/lib/security/java.security.
${java.home} refers to where java is installed i.e. "C:\j2sdk1.4.2_14".
${user.home} refers to user home directory which on Windows is "C:\Documents and Settings\<user>" where
<user> refers to the user name. For example use named David, user.home would be "C:\Documents and Settings\David"
The Windows Vista operating system is not fully supported in Java versions 1.4, Java 1.5 releases prior to build Java 1.5.0_11 (Java 1.5.0_11 or later supports Vista), or Java 6 original release or 1.6.0_01 (Java 1.6.0_02 or later supports Vista). If you are running a Java version not fully supported on Vista please update to the latest release of Java at http://www.java.com [60] or use the PVM version bundled with our applications (Java 1.5.0_11).
Some fonts can crash earlier versions of Java and this has been fixed in latest releases of Java. Visokio applications have been modified to minimise the impact of this rare problem in the event you are running older versions of Java.
Omniscope is a Java application, so their compliance with DST (as recently updated) depends on the Java VM used.
http://www.oracle.com/technetwork/java/javase/timezones-137583.html [61] provides details on Java version DST status.
Links:
[1] http://kb.visokio.com/kb/webstart
[2] http://kb.visokio.com/kb/system-requirements
[3] http://kb.visokio.com/kb/windows-service-old
[4] http://kb.visokio.com/contact
[5] http://kb.visokio.com/kb/scheduler-troubleshooting
[6] http://forums.visokio.com/discussion/1700/scheduler-running-as-a-windows-service-troubleshooting/p1
[7] http://forums.visokio.com/
[8] http://kb.visokio.com/book/export/html/732#memory
[9] http://kb.visokio.com/kb/system-wide-jdbc-locations
[10] http://kb.visokio.com/kb/windows-service
[11] http://kb.visokio.com/book/export/html/732#java
[12] http://kb.visokio.com/getomniscope
[13] http://kb.visokio.com/kb/proxysettings
[14] http://kb.visokio.com/kb/silent-install
[15] http://kb.visokio.com/download
[16] http://kb.visokio.com/kb/corpinst
[17] http://kb.visokio.com/kb/omniscope-memory-allocation
[18] http://kb.visokio.com/kb/win/test-script
[19] http://support.citrix.com/article/CTX115868
[20] http://kb.visokio.com/kb/64-bit-configuration
[21] http://kb.visokio.com/kb/customising-installations
[22] http://kb.visokio.com/kb/memory-diagnosis
[23] http://kb.visokio.com/kb/class-load-logs
[24] http://kb.visokio.com/kb/installconfig
[25] http://kb.visokio.com/kb/activation-deactivation
[26] http://kb.visokio.com/files/Resources/KB/KBInstallation/OmniscopeEnterprise.command
[27] http://kb.visokio.com/files/Resources/KB/KBInstallation/OmniscopeEnterprise-no-gui.command
[28] http://kb.visokio.com/eula
[29] https://www.frozentux.net/iptables-tutorial/iptables-tutorial.html#REDIRECTTARGET
[30] http://forums.visokio.com/discussion/2617/printing-pdf-export-from-linux-os-without-a-gui
[31] http://forums.visokio.com/discussion/comment/10254/#Comment_10254
[32] http://localhost:24679/
[33] http://forums.visokio.com/discussion/2617/printing-pdf-export-from-linux-os-without-a-gui/p1
[34] https://help.ubuntu.com/community/UnityLaunchersAndDesktopFiles
[35] http://kb.visokio.com/kb/custom-fonts
[36] http://kb.visokio.com/kb/non-western-data
[37] http://kb.visokio.com/kb/rebranding
[38] http://kb.visokio.com/kb/bundling-installers
[39] http://support.microsoft.com/kb/287247
[40] http://kb.visokio.com/files/Resources/KB/KBInstallation/CustomInstallations423/Branding folder example.zip
[41] http://kb.visokio.com/files/Resources/KB/KBInstallation/CustomInstallations423/Example Branding Pack 2013-08-16.ilf
[42] http://kb.visokio.com/files/Resources/KB/KBInstallation/CustomInstallations423/ExampleBrandingPack.ilf
[43] http://kb.visokio.com/kb/branding-config-settings
[44] http://kb.visokio.com/kb/cmdline
[45] http://forums.visokio.com/discussions/tagged/installation
[46] http://java.com
[47] http://kb.visokio.com/kb/java-issues
[48] http://kb.visokio.com/kb/java-memory-fragmentation
[49] http://kb.visokio.com/kb/activation
[50] http://kb.visokio.com/issue-report
[51] http://kb.visokio.com/kb/hangdiagnosis
[52] http://wiki.visokio.com/attach?page=ProxySettings/proxy.txt
[53] http://wiki.visokio.com/PageInfo.jsp?page=ProxySettings/proxy.txt
[54] http://stackoverflow.com/questions/171205/java-maximum-memory-on-windows-xp
[55] http://forums.sun.com/thread.jspa?messageID=2715152#2715152
[56] http://www.unixville.com/~moazam/
[57] http://kb.visokio.com/online-error-report
[58] http://en.wikipedia.org/wiki/Java_(programming_language)
[59] http://kb.visokio.com/kb/troubleshooting
[60] http://www.java.com
[61] http://www.oracle.com/technetwork/java/javase/timezones-137583.html