Omniscope version 2.5 and beyond include a connector that can import e-mail from any online email account supporting either the IMAP or POP-3 email management protocols. Most modern web-based email accounts support at least one of these protocols.
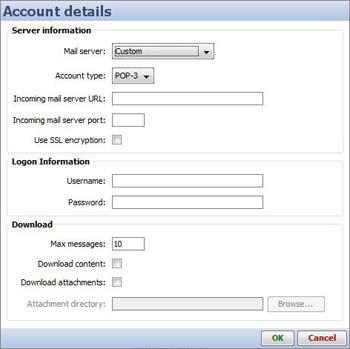
To import email data into Omniscope, select File > Open online source > Email. The Account details dialog will be displayed:
| Mail server - Select your email server. If your email server does not appear in this list you should select the 'Custom' option. Accounttype -This option is only enabled if you select the 'Custom' mailserver. Select the type of email account (either POP-3 or IMAP). Incomingmail server URL - This option is only enabled if you select the 'Custom'mail server. Select the address of the mail server. Incoming mail server port - This option is only enabled if you select the 'Custom' mail server. Enter the mail server port. UseSSL Encryption - This option is only enabled if you select the 'Custom'mail server. Check this box if your email server uses Secure SocketsLayer encryption. Username - Enter the username you use to log-in to your email account. Password - Enter the password you use to log-in to your email account. Maxmessages - Determines the maximum number of email messages that will bedownloaded. A value of '10' means the 10 most recent messages will bedownloaded. Download content - Check this box if you want todownload the message content. This will enable you to read messageswithin Omniscope but will also increase the size and amount of datadownloaded. Download attachments - Check this box if you want todownload message attachments. If this option is selected, then you mustalso specify a valid attachment directory. Attachment directory - This determines the folder attachments are moved to after they have been downloaded. |
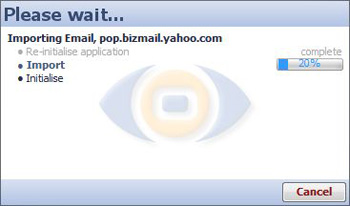
Once you have entered the relevant information click the 'OK' button to start downloading the message data. A status dialog will be displayed to show you how many messages have been downloaded and how many are still to come: