Applies to version 2.4 only
Omniscope enables you to deliver interactive, data-rich, visual presentations rather than dull, complex spreadsheets and/or static, non-interactive presentation slides. Omniscope also offers extensive options for branding your file, displaying advertising, focusing the end users' navigation options, and changing the layout, themes and colouring to match your organisation's standards for internal and external documents.
Commands/options relating to most of the elements of the display of pages/tabs in a given file are found under the Main Toolbar Appearance and Help menus. This page covers only two of the most commonly-used options; Branding and View restrictions. See Commands Reference 2-4 > Appearance [1]for a complete overview of commands on the Appearance sub-menu.
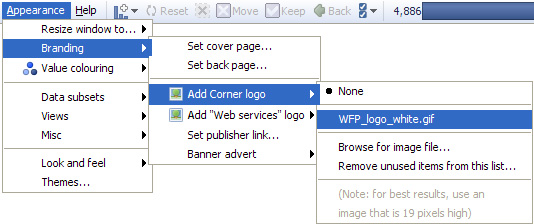
{Omniscope Professional & Enterprise only} The Branding sub-menu provides options to configure either of two informational pop-up screens presented on opening and closing a given file. It also provides the option to change the corner logo display from 'Visokio' to a logo of your own (with a link back to your own page), and to display banner advertising images and links in your downloadable Omniscope files.
There are two pop-up informational screens you can configure:
The Add Corner logo, Add Web Services menu logo, and Set publisher link options enable data publishers to further brand their files. The Banner advert sub-menu enables publishers to add advertising images and links to their files to fully integrate with the commercial aspects of their business. For more information, see Appearance Menu [1] and Advertising Options. [2]
Note: The Help page and banner advertising displays are currently the same for the working display and all the Report Pages in the file, rather than configurable for each Report Page. This may change in future versions. To edit the file specific Help Page, see Help > Create/Edit help page.
Clicking on the option to configure a Cover and Back informational screens launches a Set Page dialog that accepts your inputs from you. The dialogs used to create the Cover and Back informational pages are both similar to the one shown below:
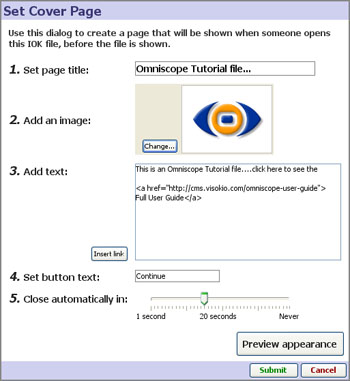
Note: Both information screens support some aspects of HTML text formatting, such as <b>, <i> etc. Currently, informational screens behave differently to the file-specific Help Page, which does not require hard returns and can be re-sized directly in preview mode.
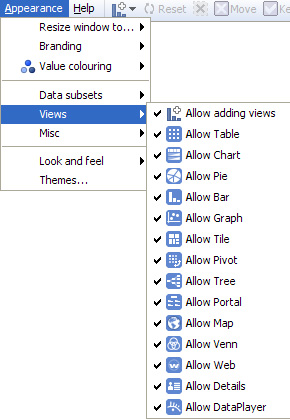
For any given data set, one or more of Omniscope's 14 different views may not be needed to best depict the data set and support user interaction. It may be that the data does not contain any fields (columns) useful to plot against other fields in the Graph View. Some files could have so many different unique Category values in different fields that the Tree View becomes slow to open and use. Whether for these or other reasons relating to simplifying the file, it is possible to hide selected views from the users' View Chooser menus by unticking the view on the list displayed under Appearance > Views > {view restrictions}:
In addition to logos/background images and font selection, all the colours associated with an file can be managed using the options available under Appearance > Themes. There is a library of predefined Themes, and you also create your own combination of corporate colours and save the settings as your own named Theme which you can share with others. More on managing Themes [3].
Applies to Omniscope 2.4 only.
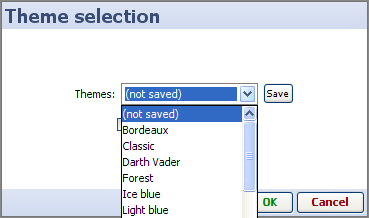
Themes are combinations of display settings you can change under Appearance > Look and Feel. These settings control most of the visible aspects of each file, outside of the controls available within individual views. By default, a built-in style called Default is used for every file. A menu of alternative pre-defined themes is available Appearance > Themes. You can see the different colouring effects by changing the style applied to the open file.
 Ice Blue | 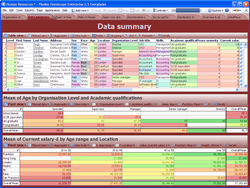 Bordeaux | 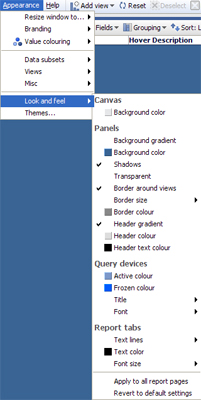 | |
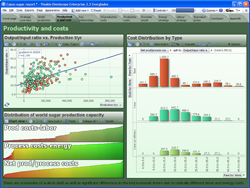 Forest | 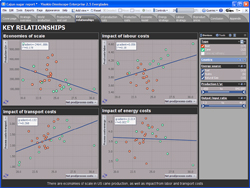 Darth Vader |
Create a corporate style corresponding to your corporate colours and general style of presentation, using a combination of official logos, font settings, colours and effects, which you can define using Appearance > Look and Feel. Once you are satisfied with all the settings, name and save your official style preset and it will become a new option on your Appearance > Themes menu. You can also copy this customised style preset to others in your organisation (see below), so that the official corporate preset is available in the same menu to everyone configuring files.
If you change any settings relative to the current style preset, the Preset selection drop down will show that the new altered preset is not saved. Click Save to give a name to the newly-modified style preset and save it to your installation, from which it will be available for future use, and transferable in the form of an .XML file you can copy across machines.
 The settings corresponding to the new style preset are saved in a local .XML file named {YourPresetName}.XML. Anyone who creates a new file from an existing file can use the same style preset, which is part of the file. However, anyone creating a new file will not have access to the custom corporate style unless it is first copied to their machine.
Currently, to make a style preset you have defined available to others, you need to find the file called {YourPresetName}.XML on your machine, send a copy of this file to others needing to originate (not view) files with his preset, and tell them the location on their machine to copy this file so that it will be available to them whenever they create a new Omniscope file.
The location to find/copy the .XML style preset files varies by version of Omniscope and your version of Windows, as described below:
Vista:
C:\Users\UserName\AppData\Local\VirtualStore\Program Files\Visokio Omniscope\UserThemes
Windows XP:
C:\Program Files\Visokio Omniscope\UserThemes
If your system is set to hide system-related files and folders, you may not see the above locations until you change this setting:
1. Open the folder options in Windows:
Windows XP:
Open menu [START] > Settings > Control Panel > Folder options
Windows Vista:
Open menu [START] > Control Panel > Appearance and Personalisation > Folder options
2. Click on the View tab and enable the option 'Show hidden files and folders'.
Links:
[1] http://kb.visokio.com/appearance-menu-2-4
[2] http://kb.visokio.com/advertising-options
[3] http://kb.visokio.com/manage-themes